Ramen-Ya

IMG_0190


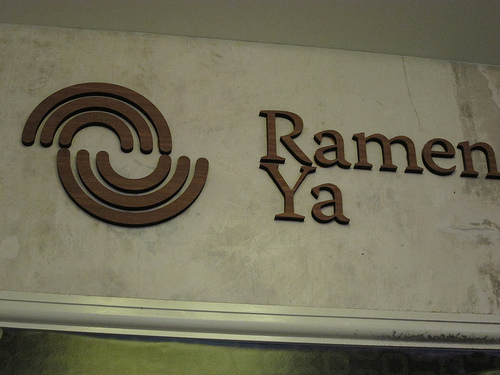
Ramen-Ya has been on the Melbourne food scene since 2007. Their original restaurant is located at GPO, along an alleyway of sorts (of course, it’s Melbourne). Their primary cuisine is Japanese Ramen,  but they also offer a selection of bento boxes. To keep you reassured, this is an authentic Japanese eatery, and quite a popular one at that, with another Ramen-Ya located further down on Bourke St.

IMG_0193

Oddly enough, I ordered something not particularly authentic but becoming quite popular in Japanese restaurants. I saw many Japanese restaurants in Vancouver that had Korean fusion dishes. The Korean flavour to this ramen dish adds an interesting taste to the dish. It’s a bit sour and a tad spicy and mostly what Kimchi is. You can pick your soup base too, I chose the Miso one just to be a little different. I found it to be intriguing combination but the only downside is that the soup was lukewarm, and by the time you finish it, it’s basically cold! Other than that, it’s a delightful dish that’s mostly vegetarian apart from the charshu but having the soup hot would have made me like it even more.

IMG_0194


Ramen-Ya’s Chicken Teriyaki bento is also nicely prepared. The chicken teriyaki has that usual teriyaki flavour, it needs a bit of the Japanese chilli powder just to give it a bit of a kick but the chicken was well cooked and seasoned. Really, what more could you ask for.

IMG_0196

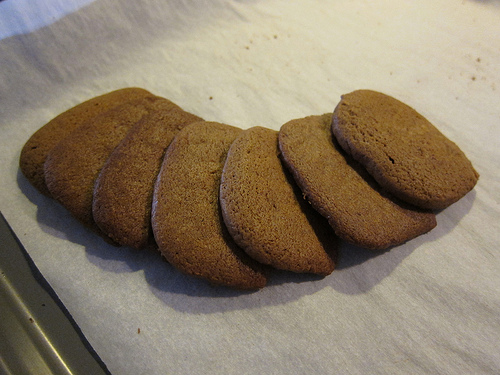
I really liked the taste of the Beef Sukiyaki, the beef is nice and soft and the sauce (albeit it’s on the sweet side) is delicious.  You can get salad and miso soup, or any dish, for a small sum if you’re eager to round out your meal. The bite sized gyoza had a very substantial flavour to the filling, with that hint of ginger, and freshly cooked is also very pleasing.

Impressions

Ramen-Ya serves up authentic Japanese cuisine that is certain to delight people’s tastebuds. You can really see why people come back for more but I really do hope the lukewarm soup base for my Ramen was a one time mistake (it was also an extremely warm day) as it can really detract from your dining experience. I never am quite satisfied when eating cold food that is supposed to be warm, it just doesn’t fill you up in the same way.

Ramen Ya on Urbanspoon

Ramen-Ya
Shop 25G Melbourne GPO
350 Bourke St
Melbourne VIC 3000

Pandan Snow Skin Mini Mooncakes with Peppermint Lotus Paste and Pumpkin Seeds

IMG_0585


Mooncake Festival is one of those Chinese traditions, where you eat a considerable amount of mooncake to celebrate well, a full moon. There are a number of Chinese festivals and it’s hard to keep track of them all but the Mooncake festival is one of those bigger occasions other than Chinese New Year. Lately I’ve become fond of the “snow skin” mooncakes and staying away from those traditional mooncakes which are golden brown in colour and have a wonderful fragrance to it. It’s probably due to my affection for mochi. We decided to give this a try using Christine’s Recipe. Check it out below

Pandan Snow Skin Mooncakes with Coconut Mung Bean Filling (Christine’s Recipes)
Prep time: 15 mins
Cook time: 60 mins
Yield: 16 mini mooncakes (50 grams each)

Ingredients
55 gm glutinous rice flour
45 gm rice flour
25 gm wheat flour / wheat starch
60 gm caster sugar
190 ml milk
30 ml condensed milk
25 ml vegetable oil (such as sunflower oil or canola oil)
40 ml pandan juice
2 to 3 drops of pandan paste / pandan essence, optional
320 gm peppermint lotus paste (or any other filling you like!)
2 Tbsp cooked glutinous rice flour, for coating

Method
1. In a large mixing bowl, combine glutinous rice flour, rice flour, wheat flour and sugar well.

IMG_9228

2. Mix milk, condensed milk, pandan juice and oil together. Pour into the flour mixture and stir to combine. Drain through a fine sieve into a large and shallow pan.

IMG_9229
3. Steam the batter in a wok over medium-high heat, for about 15 to 20 minutes. Try a bit of the dough. If it doesn’t have any raw flour taste, it’s cooked through. Remove from wok and let it cool down.

IMG_9230
4. Scrape the dough out onto a plastic board or a kitchen benchtop lined with plastic film. Lightly knead by hand until smooth. Cut dough into 16 portions, 30 grams of each.

5. Divide mung bean filling into 16 portions, 20 grams of each. Roll each into a round shape.

6. Wrap each filling ball with a dough portion. Roll with your palms and lightly coat with cooked glutinous rice flour. Shake off any excess flour. Place into a mooncake mould. Press to print the pattern. Repeat this step until finish all the dough and fillings. Store the mooncakes into an air-tight container. Put kitchen paper on top to prevent any condensed water dropped on the mooncake surface. Refrigerate overnight. Enjoy.

IMG_0586

Notes (Christine’s)
– How to prepare cooked glutinous rice flour: Simply cook the flour in a frypan without any oil over medium-low heat, stirring occasionally. When smoke releases and the flour turns light yellow, it’s cooked. Remove from the heat and let it cool down completely. Then you can use it to coat your mooncakes.

– When the dough is still hot, it seems to be quite oily. Don’t worry. It won’t be greasy at all, when it cools down completely.

– The snow skin mooncakes can be stored in freezer up to a few weeks. Before serving, just transfer the mooncakes to fridge for about 3 hours, until they become soften a bit.

IMG_0587

Impressions

I used a peppermint lotus paste for this recipe which I kindly received from a family friend in Malaysia. It had quite an interesting flavour to it but I’m not quite sure if it would be too many peoples’ liking.

For this recipe I used a bit more pandan essence as when I tasted the mixture, it was almost non existant but YMMV. I found I could only make 10 mooncakes with this recipe, I’m uncertain if it’s because the mixture evaporated or Christine used smaller moulds. I thought these were quite small anyway.

Eaten fresh, these mooncakes are soft with a bit of bite to them but once left out in the open for sometime they seem to harden up. I’m unsure if that’s just normal with these snow skin mooncakes because I’ve tried a Hong Kong variation which is stored in the fridge that was very soft to the touch and absolutely delicious (Mango flavoured).  I’ll probably try a different recipe next time but these turned out relatively so it’s not a bad recipe by any means.

La Belle Miette Macarons

IMG_0593


I never actually got a chance to visit La Belle Miette on Hardware Lane in the city since my work place is so far out. Luckily, they had a pop-up store in Chadstone Shopping Centre before Christmas. I believe it’s still there but I’m unsure as I haven’t ventured to Chadstone SC for a few months.

I’ve heard good reviews about their macarons so it seemed like a great opportunity to give these ones a try. At the pop-up store, they had quite a number of flavours, I think around 15. Some of your standard like Vanilla and Hazelnut but some very interesting ones which you’ll see below.

IMG_9239


Here we have the Raspberry flavoured macaron, it was pleasant tasting as it had a slight tanginess to the filling with a crispy and soft inside. Nothing too out of the ordinary though. Luxbites Raspberry macaron I felt was way more flavourful and had a very nice zing (probably due to the fresh raspberries).

IMG_9237


Here’s where it gets interesting, La Belle Miette’s Bastille has a  Moet et Chandon and Blackcurrant filling which was absolutely delicious. You can really taste the champagne in the cream, and my golly do I love it. The blackcurrant jelly adds texture and berry sweetness which is delightful to eat.

IMG_9236


La Belle Miette calls this one the Mariage Freres Earl Grey Chocolate and the tea flavour is strong in this one. If you like that slightly musty tea leaves taste (Earl Grey basically) you will definitely like this one. The chocolate isn’t too sweetness, I think they use dark chocolate or a higher percentage cocoa which in my opinion is preferable. I never really like milk chocolate all that much.

IMG_9235


For something a little more tropical, they have a Mango and Coconut macaron, I found the mango tasted a bit artificial but I would think they would use real mangos to make the filling. So I’m not sure why it tasted a a bit off. This coconut flavour was quite nice, it complements the mango well. A tad pina colada so it’s not really to my liking.

IMG_9234


While I was tasting this I was like what am I eating? Several minutes later, ding! POMEGRANATE. They call this Pimm’s & Pomegranate and I don’t really know what to think of it. It certainly isn’t too sweet, it has that fruity flavour but over than that I wasn’t too overly excited by it.

Impressions

I say La Belle Miette macarons are one of the better ones around. I do really enjoy the variety of macarons and that Moet macaron, although is pricier then the rest is one of my favourite macarons ever. Give them a try because they are bite sized punches of flavour.

La Belle Miette on Urbanspoon

La Belle Miette

Melbourne CBD

30 Hardware Lane
Melbourne VIC 3000

Chadstone Shopping Centre

Malvern East VIC 3145 (Next to Seed/Sass & Bide)

Homemade Sausage Rolls (Everyday Gourmet)

IMG_0173

I saw this recipe on TV on Everyday Gourmet, with former Masterchef contestant Justine Schofield. What attracted me to the recipe was the ingredients she used, adding sambal oelek made me quite curious to taste how it would turned out. It also looked delicious when the sausage rolls were taken out of the oven. I thought why not give it a try, it’d be way better than those frozen/Four and Twenty/tucker shop varieties.

My primary difference was using Beef Mince, along with Beef/Pork Sausages (With no skin) as noted below.

Sausage Rolls (Everyday Gourmet – Justine Schofield)

Time: 35 minutes
Serves: 16

Ingredients
2 sheets frozen puff pastry, thawed
300g lamb mince (Or Beef)
3 Italian sausages, skin removed (6 small Beef/Pork Sausages – no skin)
1 ½ tsp. fennel seeds
1 tbs sambal oelek (2 1/2 tbs sambal oelek)
1 tbs tomato paste
1 onion, finely chopped and fried
2 tbs parsley, finely chopped
2 eggs, 1 lightly beaten
1 carrot, finely grated
Salt and pepper
Toasted Sesame Seeds (Optional)

Method

1. Pre heat the oven to 200C. Lightly grease and line a large baking tray with baking paper.

2. In a large bowl mix lamb (beef) mince, sausages, fennel seeds, tomato paste, sambal oelek, onion, grated carrot, parsley and 1 egg. Season well with salt and pepper. With your hands thoroughly combine the meat mixture. If you want to taste whether or not the seasoning is to your liking, try  taking a small spoonful of the meat mixture and cooking it (pan/oven/microwave) but if using a microwave make sure it’s cooked all the way through.

IMG_0166

3. Cut pastry sheet in half. Place one quarter of the mixture along the length of the pastry pressing together tightly. Roll the sausage roll log until the meat is completely covered with ½ of pastry. Cut excess pastry. Cut into 4 pieces and place on the baking tray.Repeat the process with the remaining ingredients.

IMG_0167

4. Brush some lightly beaten egg over the mini sausage rolls and sprinkle the sesame seeds on top, cook in the oven for 20 minutes or until the pastry is golden brown. Serve with your favourite tomato chutney or sauce.

IMG_0168

IMG_0171

Impressions

I loved this recipe! Having the sambal oelek in the recipe makes the difference, It simply cannot be ignored. I saw in Justine’s pictures that she sprinkled what looked like black sesame seeds on top but I wasn’t sure. We didn’t have any so I used the white variety instead, made it look better (I think).

You may notice that the fat from the sausages/ mince etc liquifies and spills on to the baking paper. This is what happened with mine, I just scraped it off from the bottom and cut it off from the sausage rolls and re-plated it.

Using beef does give it a strong beef taste but I think some will enjoy it, as not everybody seems to like the taste/smell of lamb.


Wong’s Lucky Bar

IMG_0123


Wong’s Lucky Bar is an extremely popular eatery in Box Hill, right next to the tram stop. They serve Chinese food, but one of their main attractions is their cheap Crab. I believe it’s around $13 dollars a pound, and $5 extra for noodles for each person. Bookings are essential for dinner as seats fill up quickly and queues can start to form early. You’ll find the interior to be slightly strange with seating placed anywhere possible. They even use the next door’s cafe for seating!

Wong’s Crabs’ can be cooked a variety of ways, we ordered the Singapore Chilli Crab with noodles as I love Chinese Crab with noodles. While it looked mouth watering, the taste of the crab was lacking. You could hardly taste the crab meat but the Chilli Crab sauce was decent. I wished it was more flavourful and spicy but the sweetness of the sauce was there and it accompanied the crab well. I think you basically get what you pay for so don’t go looking here for the freshest, most tasty crab meal as you won’t find it here. We tried the Crab at All People Chinese Restaurant in Burwood East, and that was incomparable to here. Extremely tasty but the price difference is also world’s apart.

IMG_0122


As out accompaniment, we ordered Balachan Spinach. This had a lot of zing to it as a result of the addition of chillies. Nicely cooked and flavour was excellent. A tad oily but it’s like any Chinese restaurant.

Impressions

If you want cheap(ish) food, served relatively quickly and don’t mind the chaos and almost non existant customer service Wong’s Lucky Bar is the place for you. They have a wide variety of seafood dishes and other standard Chinese dishes to cater to many. Give it a try!

Wong's Lucky Bar on Urbanspoon

Wong’s Lucky Bar

921 Whitehorse Rd
Box Hill VIC 3128

T: 03 9899 8558

Chocolate Orange Mini Cupcakes

IMG_0546

Orange and Chocolate go so well together, so I decided to try to bake some mini cupcakes. The recipe I used also had a orange and white chocolate buttercream icing on top but I thought I’d try it without it. Sometimes cupcakes just don’t need icing. I found this recipe off BBC Food which has many interesting recipes to try, luckily they also have both the metric and imperial measurements.

Chocolate Orange Cupcakes

Ingredients
For the cupcakes
120g/4oz plain flour
140g/5oz caster sugar (Halved to 70g)
1 tsp baking power
40g/1½oz unsalted butter
50g/2oz dark chocolate, melted
1 free-range egg
125ml/4fl oz milk
1 orange, juice only
3 tbsp granulated sugar

For the white chocolate and orange buttercream
125g/4½oz unsalted butter, softened
250g/9oz icing sugar
2-3 tbsp milk
50g/1¾oz white chocolate, melted
1 orange, zest only
100g/3½oz orange chocolate


Method
1. Preheat the oven to 170C/325F/Gas 3. Line a 12-hole muffin tin with paper cases.

2. Mix the flour, sugar and baking powder together in a food processor. Add the butter and pulse until combined.

3. Whisk the melted chocolate, egg and milk together in a jug.

4. Stir the chocolate mixture into the flour mixture until just combined.

IMG_0541

5. Spoon the mixture into the cases and bake for 15-20 minutes, or until risen and golden-brown and a skewer inserted into the middle comes out clean. Remove from the oven and set aside to cool for 10 minutes.

6. Meanwhile, mix the orange juice and granulated sugar together in a bowl. Carefully pour the orange juice mixture over the warm cakes and set aside to cool completely.

7. For the white chocolate and orange buttercream, beat the butter in a bowl until light and fluffy. Carefully stir in the icing sugar and continue to beat for five minutes. Beat in the milk, melted chocolate and orange zest.

8. Decorate the cupcakes with the buttercream

Impressions

I found the recipe did require the buttercream icing on top because the orange juice mixture didn’t really soak through the cupcakes. They basically just slid off the tops. It also gave the cakes a slightly damp feel to them as a result. The chocolate flavour was quite good though, perhaps its because the recipe requires chocolate and not just cocoa powder as some recipes do. With the orange juice mix you can taste it slightly but just not enough. I think I’ll try making it with an orange buttercream but without white chocolate as white chocolate tends to be extra sweet.

Thai Yim

IMG_9175

Thai Yim used to be one of my favourite restaurants in Glen Waverley, and one of the very few close Thai restaurants close to home. Thai Yim was originally located right next to Glen Waverley railway station but due to the re-development of that area and the addition of apartments (still under construction), they have relocated to Springvale Road, next to Shira Nui. I call that address the death spot because of how quick restaurants seemed to open up and close down. It gets very little foot traffic since it’s still a walk from the main hub on Kingsway. I digress.

What I liked about Thai Yim when they were in their original location was that the food was tasty (spicy too) and the servings were generous. What happened when they moved to their larger space was that serving sizes decreased and prices went up. Although food wise I think it has mostly stayed the same. That’s why I say used to be.

We usually order a few dishes and then share around like what you’d normally do in a Chinese restaurant. We ordered the Spicy Basil and Chilli Stir Fry, Massaman Beef Curry and Tom Yum Vegetarian.

The Basil Stir Fry is quite fragrant due to the Thai basil used and it is stir fried with bamboo shoots. After trying Marion’s Green Curry that came with bamboo shoots, I can’t get enough of it. It has a pleasant spice to it, which I don’t believe is overpowering. One of my favourite stir fry’s actually.

IMG_9176

Their Massaman Beef Curry is also another pleasant experience. It has a sweetness to it that is appealing to my tastebuds, but has a good deal of spice. Not much sourness to complete the whole Thai flavour pallet. The nuts make this dish so much more enjoyable for that crunch. Everything works in harmony of each other. It’s no Green Curry but I like it nonetheless.

IMG_9178

The Vegetarian Tom Yum soup is another treat. It’s a strong clear base soup packed full of flavour with nice chilli hit. Sometimes Tom Yum soups can be either so lacking in flavour it’s like drinking water but this is certainly not the case.  Their Chicken variation is no different but this one feels much more refreshing as a vegetarian soup.

Impressions

Thai Yim certainly impresses with its dishes, it’s probably only disappointing to those that have followed them since they were next to the train station. For the price it can lean towards overpriced for what your receive, your consolation is that the food would at least come out decent (I hope).

Thai Yim on Urbanspoon

Thai Yim

249 Springvale Rd
Glen Waverley VIC 3150

Ginger Snaps (SimpleRecipes)

IMG_0177

 It’s that festive time of year and what better way to get into the mood then to bake some ginger cookies! I really don’t know why I like ginger snaps/cookies so much, I have such a strong distaste for ginger in anything. I found this recipe on SimpleRecipes.com and thought they looked quite cute. Little did I know how out of ordinary the recipe was when I started to make it.

Gingersnap Cookies (SimplyRecipes)

Yield: Makes 6 to 8 dozen cookies.

Ingredients
8 oz unsalted butter (226g)
1 1/4 cup + 2 Tbsp. granulated sugar (I used a bit more than 1/2 cup brown sugar)
1/2 teaspoon vanilla extract
2 small eggs or 1 1/2 large eggs
1/3 cup molasses
3 cups all-purpose flour
2 1/2 teaspoon baking soda
1/2 teaspoon salt
2 1/2 teaspoon cinnamon
2 1/2 teaspoon ground ginger
1/8 teaspoon finely ground black pepper

Method
1. Cream butter until soft; add sugar, and beat until light and fluffy. Add vanilla and eggs, and beat until fluffy. Add molasses and beat until well-mixed.

2. Sift the dry ingredients; add to the mixture, 1/3 at a time. Mix only until the dry ingredients become incorporated.

IMG_0174

3. Line a 9″ x 5″ loaf pan with plastic wrap, so that some hangs over the outsides. Press the dough into the bottom of the pan. Pack it tightly, and try to make the top as level as possible. Cover the dough with the plastic overhangs. Freeze until very firm, preferably overnight.

IMG_0175

4. Unwrap and remove dough from the pan. Slice brick into thin slices, no more than 1/8″. Place on a parchment or Silpat-lined sheetpan (space at least an inch apart) and bake at 175 degrees Celsius until the edges turn dark brown, 7-12 minutes, depending on how thinly you have sliced the dough. Check the oven for doneness at 7 minutes.

IMG_0176

IMG_0178


Impressions

I made a few variations that didn’t seem to turn out that well. For one, I used cooking margarine which will have a lower fat content so it makes it less firm. So you’ll have difficulty trying to slice it evenly after it’s supposedly frozen and it’s hard to cut thin pieces because of it. Using a loaf pan is probably a good idea so you’ll get a consistent shape. My cookies certainly look terrible unattractive so that’s a reason to use a loaf pan instead of just throwing it into the freezer on a flat surface.

The other change I made was to the sugar content, I halved roughly but the cookies come out slightly less sweet then I would have liked. Probably 3/4 cup brown sugar would be the right amount if you’re eating them like this. I think if you intended on icing these

Other than that, taste wise it’s pretty good. I added a tad more ground ginger maybe 1/2 tsp and it gives it a more pronounced flavour to it.

Would I try the recipe again? I might, the long “cooking” time is a bit of a disincentive as you’ll have to wait one night or so to bake it but if I had an abundance of free time it’s worth a shot to try and perfect it.

Merry Xmas and have a safe and joyous New Year!


Cranberry and White Chocolate Oatmeal Cookies

IMG_9242

One day I had the urge to make Cranberry and White Chocolate cookies, I think I’ve seen it in stores before but I had this idea that dried cranberries were small and diced. I was searching high and low for these cranberries but to no avail. I don’t even think they exist now. So instead I bought the usual dried cranberries which are a bit chunky. I came across this recipe from Rachel @ Simple Girl and they looked absolutely delicious.

Cranberry Oatmeal White Chocolate Cookies (Simple Girl)
Makes 4 dozen cookies

Ingredients

1 cup butter or margarine (softened) – I used margarine
1 cup firmly packed brown sugar (1/2 cup used)
1/2 cup granulated/caster sugar (1/8 cup)
2 eggs
1 teaspoon vanilla extract
1 1/2 cups all-purpose flour (or white, whole wheat flour) (I used all whole wheat flour)
1 teaspoon baking soda
1/2 teaspoon salt
3 cups oats
1 cup dried cranberries
1 cup white chocolate chips (Reduce this to 1/2 cup)

Method

1. Heat oven to 175 degrees Celsius.
2. Beat together margarine and sugars until creamy.
3. Add eggs and vanilla; beat well.
4. Add combined flour, baking soda and salt. Mix well.
5.. Stir in oats, dried cranberries and white chocolate chips.
6. Drop by rounded tablespoonfuls onto a parchment lined cookie sheet.

IMG_9241

7. Bake 8 – 9 minutes. (I prefer to slightly under bake until the tops just turn slightly brown.)

Impressions

I liked this recipe  but even after reducing the brown sugar and caster sugar it was still very sweet! I think it was because both the cranberries and white chocolate are already sweet. If I were to make these again, I would reduce the white chocolate to 1/2 cup as I put in 1 cup when I made these and the white chocolate was too plentiful. The oats can be slightly big so you may want to add them to a food processor give it a couple seconds whizz so the oats are a tad smaller.

These cookies with oats aren’t your typical crispy/crunchy type, because of the oats it makes it slightly soft so if you’re not fond of it then this might not be for you. Nonetheless it’s a tasty treat that makes you feel less guilty about eating them and very easy and quick to make.

Luxbites

IMG_0557

I heard so many good things about LuxBite that I had to force myself (not too hard, obviously) to make my way to their South Yarra location. LuxBite serves primarily sweet desserts and confectionary, but they also serve coffee, breakfast and lunch too! What makes LuxBite slightly different is that they have a slight Asian influenced to some of their desserts, for example one of their macarons has a Kaya filling. Kaya is a Malaysian term for Coconut Jam and homemade Kaya is absolutely delicious.

Their store is quite close by to South Yarra station, so it makes it convenient for those without cars or car-averse.

IMG_9164

In the above picture, hopefully you can see their selection of macaron flavours. There are your popular flavours such as Salted Caramel and Hazelnut have more interesting flavours like Rose and Ribena Lemonade.

IMG_9166

Their store has quite a number of sweet delights to choose from, with many having that French flair ala Elcairs as shown at the bottom of the image.

IMG_9165

It was really hard to choose a couple of desserts to try because they have so many on offer! We were still heading towards the city for the day so I couldn’t choose anything that needed to go to the fridge quickly so that helped.

As shown above, we chose the Chocolate Hazelnut Macaron. It’s this plus sized macaron with chunks of hazelnut pieces and a hazelnut and chocolate ganache. I quite enjoyed the macaron, it’s as you would want from a macaron. Crispy, slightly chewy and sweet. The hazelnut flavour of the chocolate and nuts really helped blend everything together. A real treat.

IMG_0559

We chose the interesting Lemonade Ribeena and Kaya Toast macarons. The Kaya Toast macaron has kaya as it’s filling. I think it’s homemade, but their kaya was unfortunately too sweet for my liking. I would even have preferred the Kaya jam jars you can buy from an Asian grocer with pandan. Even that jam is less sweet. For those that haven’t tried Kaya before may like it though but for me it lacked the coconut flavour and was way too sweet to be enjoyable.

The Lemonade Ribena on the otherhand was very interesting. It has this cream based lemonade flavour filling but inside there is what I believe (or remember) a small Ribena jelly cube. The Ribena jelly was delicious and made that macaron one of my favourites because it had such a pleasant flavour and was different to things I’ve tried before.

IMG_0554

Last on my list was LuxBite’s Lychee Raspberry Macaron. I love all things Lychee too so I couldn’t help to be intrigued by a Lychee and Raspberry Macaron, plus it looked amazing.

Inside this macaron, there is a whole lychee, but the salmon pink filling as you can see in the image was also slightly Lychee flavoured. The combination of the sweetness of Lychee along with the sourness of the icing sugar dusted Raspberries worked a treat. It melded together really well as the freshness of the Raspberries cut through that sweetness of basically everything else. A joy to eat.

Impressions

LuxBite impresses with its well crafted pieces that look amazing and taste great too. It’s no wonder people keep coming back for more. I really do recommend giving LuxBite a try.

LuxBite on Urbanspoon

LuxBite (Menu)

38 Toorak Road
South Yarra VIC 3141