Malted Walnut Seed Bread

IMG_5289-1

Kneading bread or dough is very relaxing for me so I was very happy to try out this recipe from BBC GoodFood which looked very simple to make (Spoiler alert: it was) and yet so appealing with its use of wholemeal flour and mixed seeds to give it a bit of a bite inside. The smell of freshly baked bread is just simply amazing for breakfast, take a look at the recipe below.

Malted Walnut Seed Loaf (Classic White Loaf Recipe)

Ingredients

500g strong wholemeal flour
7g sachet fast-action dried yeast
2 tsp bread improver (Optional)
1 tsp salt
up to 350ml warm water
100g mixed seeds (I used a mix of pepitas, sunflower seeds and pine nuts)
50g walnut pieces
a little sunflower oil, for greasing

DSC00952-1

Method

1. Make the dough with the flour, yeast, salt (and bread improved if wanted) by tipping the flour, yeast and salt into a large bowl and making a well in the middle.

DSC00953-1

2. Pour in most of the water and use your fingers or a wooden spoon to mix the flour and water together until combined to a slightly wet, pillowy, workable dough  (add a splash more water if necessary)

DSC00954-1

3. Tip the dough onto a lightly floured surface and start adding most of the seeds and all the walnuts as you knead.  Knead for at least 10 mins until smooth and elastic (Can also be done in a tabletop mixer with a dough hook but why skip all that fun)

DSC00957-1DSC00959-1

4. Place the dough in a clean oiled bowl, cover with cling film and leave to rise until doubled in size.

DSC00960-1DSC00962-1

5. Knock back the dough by tipping it back onto a floured surface and pushing the air out. Shape the dough into a large round and roll the round in the remaining seeds, then lift the bread into a tray to prove for about 30 mins until doubled in size. (I left mine overnight to bake fresh in the morning)

DSC00964-1DSC00966-1

6. Heat oven to 220C/fan 200C/gas 7. Bake the bread for 15 mins, then reduce the heat to 190C/fan 170C/gas 5 and continue to bake for 30 mins until the loaf sounds hollow when tapped on the base. Leave the bread on a cooling rack to cool completely.

The loaf will stay fresh in an airtight container for 3 days or can be frozen for 1 month.

IMG_5282-1

Impressions

This bread was very easy to make, with just a small amount of waiting time for it to rise. The bread comes out soft inside but still crunchy with the pine nuts, pepitas and sunflower seeds. The fresh crust was also stunning and if you prefer the slices to be a bit more crunchy, just lightly toast it and then butter it and that’s basically all you need for a fantastic slice of bread. One word. Yum.

Cantaloupe Ice Cream (Ben & Jerry’s Recipe)

IMG_5142E

My love for ice cream knows no bounds. Being able to create my own ice cream from ingredients I’m familiar with is something I’ve always wanted to do as I love making things from scratch (if it isn’t too troublesome that is). Last year, I purchased the KitchenAid Ice-Cream maker attachment and have been giddy with excitement waiting for Summer to come to test it out. Having also bought the Ben & Jerry’s Homemade Ice Cream & Dessert Book, it was a good time to give it a go.

IMG_5111E

Cantaloupe Ice Cream
Makes 1 quart (~946ml)

Ingredients
1 large or 2 small cantaloupes (very ripe)
Juice of 1 lemon
Sweet Cream Base (below)

IMG_5101EIMG_5103E

Method
1. Cut the cantaloupe in half and clean out the seeds. Scoop the fruit into a mixing bowl, add the lemon juice, and mash until the fruit is pureed. Drain the juice into another bowl and reserve. Cover the melon puree and refrigerate

2. Prepare the Sweet Cream Base and whisk in the fruit juice

3. Transfer the mixture to an ice cream maker and freeze  following the manufacturer’s instructions

IMG_5107E

4. After the ice cream stiffens (about 2 minutes before it is done), add the cantaloupe. If more juice has accumulated, do not pout it in because it will water down the ice cream. Continue freezing until the ice cream is ready.

Sweet Cream Base

Makes 1 quart (~946ml)

Ingredients
2 Large eggs
3/4 cup Sugar
2 cups Heavy or whipping cream
1 cup Milk

IMG_5100E

Method
1. Whisk the eggs in a mixing bowl until light and fluffy, 1 to 2 minutes.

IMG_5105E

2. Whisk in the sugar, a little at a time, then continue whisking until completely blended, about 1 minute more.

IMG_5106E

3. Pour in the cream and milk and whisk to blend

Impressions

The recipe is a little vague in the quantity of cantaloupe to include, if you’re unsure add a bit less (much less than my pictured cantaloupe puree actually). Even our small cantaloupes here result in a great deal of puree so add a bit at a time to ensure the cream base stiffens when it’s churning otherwise you may end up with a mixture too soft to become ice-cream. Mine didn’t set too firm when churning unfortunately, but still flavourwise it’s delectably rich, yet full of cantaloupe flavour. A great recipe that just needs more specific quantities to make it work 100% of the time.


Spanish Baked Eggs (Ms I-Hua Recipe)

IMG_5153E

Having wanting to make Spanish Baked Eggs after being exposed to it here and here.  It really does seem like a simple, yet delicious breakfast, brunch or even lunch dish that you can whip up yourself in minimal time. I found this recipe from Ms I-Hua which looked so inviting that I definitely had to give it a try. After making some tacos, I had left over corn and capsicum which I just added in and came out quite well might I add.

Spanish Baked Eggs & Chorizo (Recipe by Ms I-Hua)

Ingredients:
4 mid-large Eggs (room temperature)
1 mid-sized SpicyChorizo (sliced diagonally)
1 can (400g) of Diced Tomatoes
1 can (400g) of Cannellini Beans or Butter Beans (washed and drained) – I used mixed beans
1/2 can (200g) of Sweet Corn Kernels
1/2 Red Capsicum (diced)
1 French Shallot (diced)
2 Garlic Cloves (diced)
1/2 tsp of Smoked Paprika
1/4 tsp of Ground Cumin
1/4 tsp of Cayenne Pepper
1 tsp of Parsley Flakes
1 Tbsp of Ketchup
Salt & Pepper to taste
1 Tbsp of Olive Oil
Handful of Mozarella or Cheddar cheese shredded

IMG_5144E

Method
1. Preheat your oven to 200°C (degrees Celsius).

2. In a pan, heat olive oil on medium heat and add in diced garlic and French shallots. Cook until fragrant but careful not to burn them.

3. Add diced tomatoes, cannellini/butter beans, chorizo slices, capsicum, smoked paprika, ground cumin, cayenne pepper and ketchup. Cook for about 6-8 minutes till it reduces slightly. Add in the chorizo slices (Ms I-Hua’s recipe suggests you can add them in now or just before placing the dishes in the oven)
IMG_5147E

4. Turn heat off and add in parsley flakes with salt and pepper to taste.

5. Transfer into individual cazuelas (terracotta dish) or baking dishes.
IMG_5150E

6. Make a well in the middle and break an egg into each dish. You can add some cheese on top as well before placing in the oven.
IMG_5151E

7. Place each dish into the oven and cook for 8-12 minutes depending on how you want the yolk (oozy or solid). It will take longer to cook if the eggs are straight from the fridge.
(Ms I-Hua Note: It’s best to keep an eye out on the yolk as different ovens and baking dishes/cazuelas (flat or tall) may vary in cooking time)

IMG_5152E

8. Once the baked eggs are done, take them out of the oven carefully (it’s hot!) and sprinkle with a little more salt and pepper. Garnish with fresh chervil or parsley and some cheese if preferred. Serve with a slice of sour dough bread
IMG_5154E

Impressions
I loved this recipe. It’s especially fragrant and the right amount of spices. I kinda used this recipe to use up all my other leftover ingredients which suited the recipe here actually. The cheese gave it an added richness but you can always do without it.

I must admit I over cooked the eggs, but it still came out pretty well in the end. I’d also prefer more diced tomatoes in the mix, to give it a bit more sauce though. Would definitely recommend this recipe to others, you’d be amazed at how the simplest spices of paprika, cayenne pepper and cumin (in such small quantities) can really burst out in flavour and create a genuine crowd pleaser.

Fettuccine with Parsley Pesto and Walnuts

IMG_4829E

During the last couple of months, my home grown parsley grew wild and unattended (oops). It almost looked like a small tree with a very thick and stern trunk/stem. Having an exorbitant amount of parsley I searched for recipes that used parsley in excess, which was really why I was growing parsley in the first place but never gotten around to cooking anything with it. Luckily, I found this seemingly quick and easy fresh vegetarian pasta recipe from Foodandwine.com which looked fantastic and turned out quite well too if I do say so myself. Check it out below!

Fettuccine with Walnut-Parsley Pesto
Total Time: 30 mins
Servings: 4

Ingredients
3/4 cup walnut halves (3 ounces)
1/4 cup flat-leaf parsley leaves, plus 2 tablespoons coarsely chopped
1/2 cup freshly grated Parmesan cheese, plus shavings for garnish
1/2 pound fettuccine (225 g)
1 garlic clove, smashed
1/4 cup extra-virgin olive oil
Salt and freshly ground pepper
1/2 cup vegetable stock
1 tablespoon unsalted butter

Method
1. Preheat the oven to 350°. Toast the walnuts in a pie plate for 7 minutes, or until golden; let cool. Coarsely chop 1/4 cup of walnuts and transfer to a bowl; add the 2 tablespoons of chopped parsley and half of the grated Parmesan.

2. In a large pot of boiling salted water, cook the pasta until al dente; drain.

3. In a mini food processor, pulse the remaining 1/2 cup of walnuts with the 1/4 cup of parsley leaves and the garlic until finely chopped. Add the remaining grated Parmesan cheese and the olive oil and process to a coarse purée. Season the pesto with salt and pepper.

IMG_4828E

4. Return the pasta to the pot. Add the vegetable stock and butter and simmer until the liquid is nearly absorbed, 1 to 2 minutes. Off the heat, add the pesto and toss until combined. Transfer the pasta to a bowl, garnish with the walnut, parsley and Parmesan topping and Parmesan shavings and serve.

IMG_4835E

Impressions
My only downfall with this dish was my failure of pouring in all the dry fettuccine into boiling water all at once. This resulted in clumping of the noodles and uneven cooking as some became thick strands (undercooked) and others cooked past al dente.

Flavour wise, it was pretty tasty for a dish that has minimal ingredients, the parsley pesto was extremely flavourful and a bit of a zing. As this dish has no meat, I’d actually prefer more walnuts to be added (maybe 1 cup) instead as I also added one whole bag full of fettuccine (probably too much actually). Other than that, I found this recipe to be one I’d be keen to try again.

Walnut and Choc Chip Cookies

IMG_4620E

I love freshly baked cookies and even more so love making cookies. For one, it’s so easy to make and secondly, just the smell of them baking in the oven makes you all feel like a kid again. I made these cookies when I really had nothing else to do and had walnuts and choc chips lying around in the pantry. I must point out that these cookies don’t use baking powder so you will find they will not expand in the oven nor will they have that chewy texture some might prefer (like Subway cookies). These are slightly denser but tasty nonetheless. Check out the recipe from Taste.com.au below

Walnut and Choc Chip Cookies (Taste.com.au)

Ingredients
125g butter, softened (You can use baking margarine but will not have the same taste)
50g (1/4 cup, firmly packed) brown sugar
1 egg, at room temperature
225g (1 1/2 cups) plain flour
150g good-quality dark cooking chocolate, coarsely chopped (or buttons)
150g (1 1/2 cups) walnut halves, coarsely chopped

Method
1. Preheat oven to 180°C. Line 2 baking trays with non-stick baking paper.

2. Use an electric beater to beat butter and sugar in a medium bowl until well combined. Add the egg and beat until combined.
IMG_0521

3. Sift the flour over the butter mixture and stir with a wooden spoon until well combined. Add the chocolate and walnuts, and stir to combine.
IMG_0522IMG_0524
4. Use your hands to roll tablespoonsful of the cookie mixture into balls. Place the balls, 3cm apart, on prepared trays. Use a fork to flatten slightly.

IMG_0525IMG_0527

5. Bake in preheated oven, swapping the trays halfway through cooking, for 20 minutes or until light golden. Remove from oven and set aside to cool on the trays for 5 minutes. Transfer cookies to a wire rack to cool completely.

IMG_4624E

Impressions

I used margarine (that can be used for baking) but found it lacks the buttery taste that makes cookies so tasty and also slightly drier. It’s a somewhat strange taste at first but after a few bites it isn’t so bad and actually kinda addictive. The chopped walnuts have this beautiful aroma in the cookies and the dark chocolate chips give it just enough sweetness. I know most would prefer more sugar, so even doubling the sugar while using dark chocolate chips still would be not too sweet.

I found that the original recipe uses 200g of cooking chocolate but when mixing it all in, it looked like a ridiculously large quantity that would overwhelm the entire cookie and you wouldn’t be able to shape them properly. Just slowly add the walnuts and chocolate in until you come to your preferred balance. As mentioned above, the cookies will almost be the same size before and after baking so keep that in mind. I wouldn’t call these healthy cookies but they are a lighter option if using margarine and less chocolate (and sugar)

Greek Almond Crescents

IMG_4803E

There is this bakery in  Newmarket/Flemington that has wonderful biscuits. One of these is their crescents which are buttery, light and nutty. I came across a Greek Almond Crescents recipe in the book, Mastering the Art of Baking by Anneka Manning. These Almond Crescents are very similar to the ones I found in Flemington but the ones in the recipe book do call for chopped nuts which I don’t recall them being so prominent in their version. These crescents are very easy to make and I don’t think you can really go wrong with the mixing, just knowing when the crescents are done is probably the most difficult part. Check out the recipe below!

Greek Almond Crescents
Makes 38
Preparation Time: 20 mins
Cooking Time: 20 mins

Ingredients
200g butter (softened)
1/2 cup icing sugar (sifted) plus extra for dusting
1 tsp finely grated orange zest
1 egg (at room temperature)
1 egg yolk
1 tbs brandy
375g/2 1/2 cups plain flour
1 1/2 tsp baking powder
1 tsp ground cinnamon
155g/1 cup blanched almonds, toasted and finely chopped

Method

1. Preheat oven to 160C (315F). Line 2 large baking trays with non-stick baking powder.

2. Use an electric mixer to beat the butter, sugar and orange zest in a small bowl until pale and creamy.

IMG_4732EIMG_4740E

3. Add the egg, egg yolk and brandy and continue to beat until well combined. Transfer the mixture to a large bowl.

IMG_4746E

4. Sift together the flour, baking powder and cinnamon. Then stir in the almonds. Add to the butter mixture and use a wooden spoon to mix until well combined.

IMG_4754EIMG_4748E
5. Shape level tablespoons of mixture into crescents and place on the trays, leaving about 3 cm (1 1/4 inches) between each to allow for spreading

IMG_4759EIMG_4765EIMG_4763E
6. Bake for 15-20 minutes, swapping the trays around after 10 minutes, or until lightly golden and cooked through. Leave on the trays for 5 minutes before transferring to a wire rack. Dust heavily with icing sugar while still warm then cool to room temperature.

IMG_4772EIMG_4769E


Impressions

As mentioned above, the difficult parts is probably whisking the eggs and sugar until it’s light and fluffy, mixing the flour in well and letting the crescents bake in the oven for the specified amount of time. If your crescents are larger (they will take more time) so you may want to factor that into your baking time but also a good way to check is if the bottom of the crescent is firm and can easily be lifted up (also a tad brown)

I love these crescents, it has just the right amount of butter but also the cinnamon flavour subtly comes through. If you find cinnamon a bit strong, just half the amount in the recipe and I think you still will be able to taste it. You know the crescents are perfect when it melts just ever so slowly in your mouth. Truly a recipe you wouldn’t want to miss.

IMG_4798E

White Chocolate Panna Cotta with Espresso Coffee Syrup and Toffee

IMG_4849E

 Wanting to make a Panna Cotta but without the trouble of pureeing fruits like mangos to make the Panna Cotta, I found this white chocolate recipe on Taste.com.au. The addition of the coffee syrup intrigued me as it seemed too delicious not to give it a try. I’ve made this a couple times already and have made a few changes to the recipe to my liking. As something extra, I tried to add some toffee on top just to make it look nicer.

White Chocolate Panna Cotta with Espresso Coffee Syrup (Taste.com.au)

Equipment
You will need eight 150ml capacity dariole moulds for this recipe. If you like to serve it in bowls, just any small bowls will do.

Ingredients
Panna Cotta
600ml thickened cream
1 x 180g pkt white chocolate, broken into small pieces
160ml (2/3 cup) milk (can use light milk)
70g (1/3 cup) caster sugar
2 tbs boiling water
3 tsp powdered gelatine

Coffee Syrup (Version 1)
100ml freshly brewed strong espresso coffee or 3 Nespresso capsules using the espresso function
3 or 4 tsp white sugar

Coffee Syrup (Version 2)
100ml freshly brewed espresso coffee (3 Nespresso capsules using the espresso function – froth skimmed off)
100g raw sugar/caster sugar

Toffee (Taste.com.au)
215g (1 cup) caster sugar
60ml (1/4 cup) water

Panna Cotta
Method
1. Heat water in a small saucepan over medium/high heat until it starts to boil. In a separate heat-proof bowl place the cream, chocolate, milk and caster sugar in the bowl and over the saucepan over medium/low heat.   Cook, stirring, for 3-4 minutes or until chocolate melts and mixture is smooth.
IMG_4807EIMG_4808E

2. Place the boiling water in a heatproof bowl. Sprinkle with gelatine and whisk with a fork to remove any lumps. Set aside for 3 minutes or until gelatine dissolves. (I also just place the bowl of gelatine on top of my bowl of boiling water which helps keep it warm/dissolve any extra gelatine powder)
IMG_4810E

3. Add gelatine to cream mixture and whisk to combine.

4. Pour among eight 150ml capacity dariole moulds. Place on a baking tray. Cover with plastic wrap and place in the fridge for 6 hours to set. Or overnight. Make sure the plastic wrap is tight as some of the heat from the mixture may create water droplets and affect the consistency on the top layer of the panna cotta (Although not an issue if using dariole moulds and turning them upside down)

5. Dip moulds, 1 at a time, into hot water for 1-2 seconds, then turn onto serving plates. Drizzle with coffee syrup (steps below) to serve.

IMG_4852E

Coffee Syrup (Version 1)

1. Place the coffee and white sugar in a small saucepan over medium heat. Cook, stirring, for 3 minutes or until sugar dissolves. Set aside to cool.

Note: You may not even need to heat it over a saucepan if you can dissolve the sugar in the hot coffee/espresso. If using Nespresso capsules, just skim off the froth before serving.

IMG_4809E

Coffee Syrup (Version 2)
1. Place the coffee and sugar in a small saucepan over medium/high heat until it starts to boil. Reduce down to a medium/low heat and stir until the syrup coats the back of the spoon or until the consistency desired. Please note that if you place the syrup in the fridge (or when cooled down) the syrup will be slightly more thicker and viscous than when it was cooking. Set aside to cool and then place into the fridge if you prefer it to be a thicker consistency.

IMG_4838E

Toffee
1. Stir water and sugar in a saucepan over low heat until the sugar dissolves. Don’t bring it to the boil until all the sugar is dissolved.
IMG_4820E
2. Increase heat to high. To dissolve any sugar left on the side of the pan, brush down with a wet pastry brush. Bring to boil.
3. Cook until the mixture is a rich golden colour – don’t let it burn. Remove from heat – the residual heat continues to colour toffee.

4. Allow to cool and break into pieces to decorate. Please only add the toffee when wanting to serve, otherwise the moisture from the panna cotta will result in the toffee to turn to liquid.
IMG_4825EIMG_4826E

Notes:

  • Toffee troubleshooting: A common problem when making toffee is crystallisation. The sugar clumps together into a white and grainy syrup that turns into a messy solid mass. To avoid starting again, try these tips.
  • Dissolve the sugar completely before increasing the heat and bringing the mixture to the boil. You’ll know when it’s dissolved – there won’t be any crystals on your spoon.
  • Brush any sugar crystals from the side of the pan with a wet pastry brush during the toffee-making process. Undissolved sugar on the side of the pan causes crystallisation.
  • Don’t stir the toffee mixture once it comes to the boil – this also leads to crystallisation.

Impressions

I reduced the sugar from the original recipe as I find the white chocolate already adds a significant amount of sugar to the panna cotta. The panna cotta here is smooth and creamy but slightly denser due to the larger quantity of thickened cream used. Some may prefer a lighter panna cotta (I actually do) but due to the amount of cream used and in the white chocolate too, it really can’t be helped. I’m not sure if increasing the milk quantity and lowering the cream would result in a panna cotta that sets properly but certainly I’ll keep you updated to see if that does work.

The coffee syrup (Number 1) is a more liquid syrup with less sugar. It allows the bitterness and strong espresso flavour to come out and since the panna cotta has enough sweetness, the contrast makes an excellent combination.

Version 2 of the coffee syrup is sweeter due to the requirement to make it more viscous and thicker. You don’t know how many times I tried reducing the first version into a thicker syrup when it couldn’t possibly do so with the minimal sugar added. The consistency of version 2 is lovely though.

As mentioned above, the toffee should only be added at the very last minute, as it will start to turn to liquid when either in contact with the panna cotta or coffee syrup slowly.

This recipe was a crowd pleaser so I definitely can recommend giving it a try and it’s very easy to make as well.


Roast Turkey with Bacon, Pine-Nut and Herb Stuffing

IMG_6823

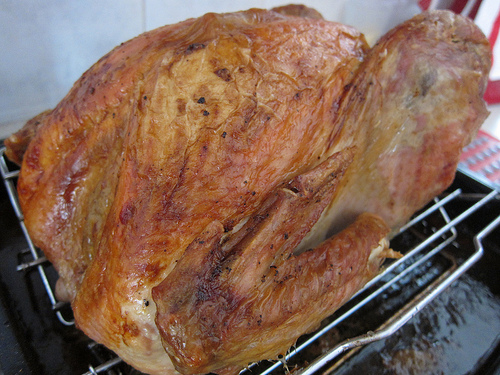
I’ve always wanted to cook a turkey and have that American Christmas. It’s something you always see on TV with the centrepiece being this just golden brown turkey straight out from the oven looking ever so lovely. This recipe I’ve tried a couple of times and the stuffing that goes with it is absolutely delicious. It can really take quite sometime to prepare and wait for it to cook but the end result is always satisfying. Check out the recipe below, I believe it’s from Women’s Weekly Christmas Edition from a couple years back.

Christmas Turkey with  Pine Nut, Herb and Bacon Stuffing

Ingredients

5kg turkey (I used a ~4kg turkey)
60g butter, melted
1 1/2 cups (375ml) salt-reduced chicken stock (or enough to cover the pan)

Pine Nut, Herb and Bacon Stuffing
125g butter
2 medium (300g) brown onions, chopped finely
2 trimmed (200g) celery stalks, chopped finely (did not include)
4 rashers bacon, chopped finely
2 cloves garlic, crushed
4 cups (200g) loosely packed coarse fresh white sourdough breadcrumbs
1/2 cup (80g) toasted pine nuts
1 cup coarsely chopped fresh flat-leaf parsely
1/4 cup finely chopped fresh sage
1 tablespoon finely grated lemon rind
1 egg, beaten lightly

Gravy
60g butter
50g plain flour
1 cup (250ml) dry white wine
1 1/2 cups (375ml) salt-reduced chicken stock

Method
Pine Nut, Herb and Bacon Stuffing:
1. Melt the butter in a large frying pan over medium heat; cook the onions, celery, bacon and garlic, stirring, until softened; cool. Combine onion mixture in a large bowl with the remaining ingredients

IMG_6822

2. Preheat oven to 180C (160C fan-forced). Discard neck from turkey if still intact. Briefly rinse turkey under cold waterl pat dry inside and out with absorbent paper. Fill neck cavity loosely with some of the stuffing (don’t pack too tightly, as it will stop the meat from cooking evenly). Secure skin over the opening with toothpicks to enclose stuffing. Fill large cavity loosely with remaining stuffing (you may have some stuffing leftover). Tie legs together with kitchen strings tuck wings under.

3. Place turkey on oiled rack in a large flameproof baking fish. Brush turkey all over with half of the butter, rub a little salt onto skin. Pour the stock into the dish. Cover dish tightly with greased foil; roast for 2 hours. Uncover turkey; brush with remaining butter. Roast, uncovered, for a further 1 hour 30 minutes or until browned all over and cooked through, adding more water to the dish if needed. Remove turkey from dish, cover turkey with foil; stand for 15 minutes while preparing gravy.

Gravy
4. Pour turkey pan juices from dish into a medium heatproof jug discard fat from surface of pan juices. Heat the butter in same baking dish, add flour; cook, stirring, until mixture is well browned. Gradually stir in wine; bring to the boil. Stir in reserved pan juices and stock; bring back to the boil and simmer, stirring until gravy thickens. Season to taste with salt and pepper. Strain gravy into a jug. Serve with turkey (Not suitable to freeze or microwave)

IMG_6825

Side Note:
Thawing Your Turkey
Allow time for thawing a frozen turkey. A 5 kg turkey will take about 3 days to thaw in the refrigerator. Place it on a tray in its original packaging or covered with plastic wrap

Checking if the Turkey is Cooked
Test it by inserting a skewer sideways into the thickest part of the thigh, then remove and press flesh to release the juices. If the juices runs clear, then the turkey is cooked.
Or, you can use a meat thermometer into the thickest part of the thigh without touching the bone. It should reach 90C

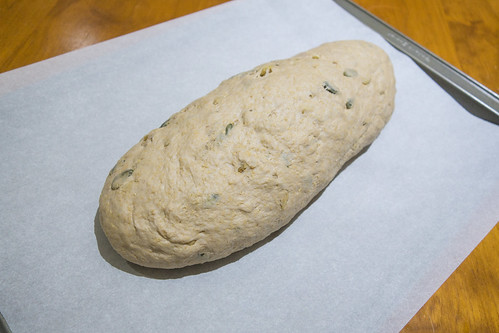
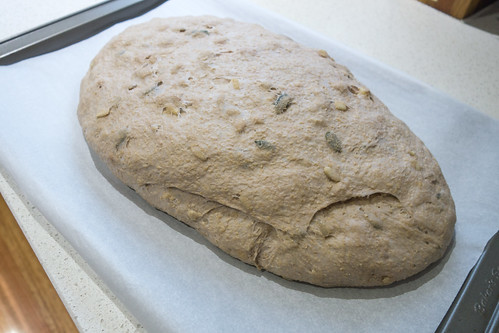
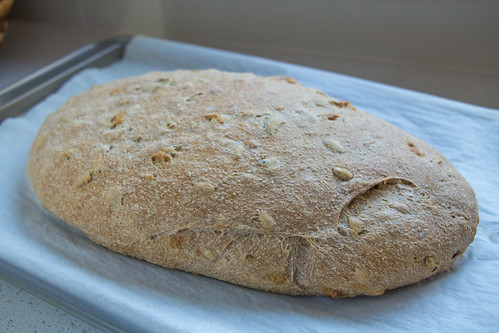
You can cook the stuffing separately
Make it as per the recipe but increasing the eggs to 2 eggs. Shape into a 28cm log on an oven tray lined with baking paper. Once the turkey is cooked, increase the oven temperature to 200C (180C fan-forced). Cook, uncovered for about 20 minutes or until well browned and crisp.

Carving Your Turkey
1. Remove kitchen string. Cut through the skin between the breast and the leg and push the leg away from the breast to make room to carve

IMG_6828

2. Begin carving slices off the breast, starting at the top of the breastbone and slicing at an angle away from the centre of the bird. Cave as much as your family needs

3. Separate drumsticks from the thigh by cutting through the knuckle at the point of the bend.

4. Make a vertical cut above the wing through the body and remove. Repeat these steps for the other side of the turkey.

Cooking Times for Turkey Sizes
2kg to 3kg – 1 hour 30 mins to 2 hours 15 mins
3.1kg to 4kg – 2 hours 15 mins to 2 hours 45 mins
4.1kg to 5kg – 2 hours 45 mins to 3 hours 30 mins
5.1kg to 6kg – 3 hours 30 mins to 4 hours 15 mins
6.1kg to 7kg – 4 hours 30 mins to 5 hours 30 mins

Impressions

Following the recipe to a T, it works out wonderfully. The meat of the turkey comes out so buttery smooth and just cooked to perfection. It can be very easy to overcook turkey. I find it you stick with those meat thermometer recommended temperatures like at 90C it can be a tad dry. I find that you can have great tasting turkey at around 77C but should be at least 74C for health and safety reasons.

The stuffing is the best stuffing I’ve ever had, and the parsley and pine nuts play a big part in that. It truly is a wonderful recipe. I’ve never tried the gravy to be honest, as I like to eat turkey with just a bit of tabasco sauce but I think most gravies taste similar so never bothered with it. The recipe is also very easy to follow and the hardest part is basically making sure the turkey is cooked right so once you got that down, cooking turkey will become a breeze.


Homemade Hot Cross Buns

IMG_0321

This probably isn’t the best time to post this seeing as it’s July. I always end up making things too late or even after the particular festive time comes around so this is just typical me. I love the smell of warm hot cross buns, it’s that cinnamon and spice mix that just keeps me calm. I also love kneading bread so making hot cross buns is jut plain relaxing. I found a recipe on Taste.com.au and it’s quite a good recipe irrespective of my little mistakes whilst trying to make it. Check it out below!

Hot Cross Buns (Taste.com.au)
Makes 12 large buns
Ingredients
4 cups plain flour
2 x 7g sachets dried yeast
1/4 cup caster sugar (a bit less)
1 1/2 teaspoons mixed spice (I didn’t have this so I used 1tbsp cinnamon, 1/2tsp ground ginger, 1/4tsp ground cloves)
pinch of salt
1/2 cups currants
1/2 dark chocolate bits
40g butter
300ml milk
2 eggs, lightly beaten

Flour paste
1/2 cup plain flour
4 to 5 tablespoons water

Glaze
1/3 cup water
2 tablespoons caster sugar

Method
1. Combine flour, yeast, sugar, mixed spice, salt and currants in a large bowl. (I split my recipe in half half, with one adding currants and the other with dark chocolate buttons)

2. Melt butter in a small saucepan over medium heat. Add milk. Heat for 1 minute, or until lukewarm.

3. Add warm milk mixture and eggs to currant mixture. Use a flat-bladed knife to mix until dough almost comes together. Use clean hands to finish mixing to form a soft dough.

IMG_0310IMG_0311

4. Turn dough out onto a floured surface. Knead for 10 minutes, or until dough is smooth. Place into a lightly oiled bowl. Cover with plastic wrap. Set aside in a warm, draught-free place for 1 to 1 1/2 hours, or until dough doubles in size.

IMG_0312IMG_0313

5. Line a large baking tray with non-stick baking paper. Punch dough down to its original size. Knead on a lightly floured surface until smooth. Divide into 12 even portions. Shape each portion into a ball. Place balls onto lined tray, about 1cm apart. Cover with plastic wrap. Set aside in a warm, draught-free place for 30 minutes, or until buns double in size. Preheat oven to 150/160°C.

IMG_0314IMG_0315IMG_0316IMG_0317

6. Make flour paste: Mix flour and water together in a small bowl until smooth, adding a little more water if paste is too thick. Spoon into a small snap-lock bag. Snip off 1 corner of bag. Pipe flour paste over tops of buns to form crosses. Bake for 20 to 25 minutes, or until buns are cooked through.

IMG_0318

7. Make glaze: Place water and sugar into a small saucepan over low heat. Stir until sugar dissolves. Bring to the boil. Boil for 5 minutes. Brush warm glaze over warm hot cross buns. Serve warm or at room temperature.

IMG_0319

Impressions

The original recipe asked to preheat at 190. I disagree as it turns out, it’s way too hot for my particular oven. It should be more at 150/160 especially if it’s fan forced. Otherwise the bun browns too fast and the inside is undercooked.

My other mistake was I poured the warm mixture of butter and milk onto my dry ingredients for my choc buns I let it sit there whilst I kneaded my currant dough. Big mistake, as it became all stiff and hard once I got back to it. So if you want to split the mixes, either knead/mix the wet and dry ingredients really quickly or do it one at a time. I was just worried the warm milk and butter mixture would cool too quickly (it didn’t).

My currant hot cross buns were soft and had a beautiful fragrance to it. These are best eaten fresh as they get hard pretty quickly unless you warm them up in the microwave. So it’s a good recipe but I’ll probably try another recipe when Easter comes around again.

IMG_0322


Almond and Berry Cupcakes (Crabapple Recipe)

IMG_0527


I’ve slightly changed this wonderful recipe taken from The Crabapple Bakery Cupcake Cookbook by Jennifer Graham. I didn’t add any decorations or icing to this cupcake and simply let the almonds and berries shine through. It’s basically a muffin disguised as a cupcake with all the icing added to it. I really liked this recipe, because it isn’t too heavy and feels less rich even though it still uses butter. I’ve added the decorations and frosting recipes for those that want to try it, but sometimes simplicity is best.

Brittany’s Fuss Free Muffin Cupcakes
– The Crabapple Bakery Cupcake Cookbook (Jennifer Graham)

Raspberry, Almond and Yoghurt Cakes
Makes 24

Ingredients
250g unsalted butter
2 cups natural yoghurt
4 eggs
2 2/3 cups plain flour
1 1/2 tablespoons baking powder
2 cups almond meal
1 2/3 cups castor sugar (used 1 cup)
500 g frozen berries (used mixed berries)
1/2 cup flaked almonds

Method
1. Preheat oven to 180C. Line two 12-hole muffin trays with cupcake papers

2. Melt the butter in a small saucepan over low heat. Leave to cool a little, then pur into a bowl with the yoghurt and eggs and whisk until thoroughly combined.

3. In a separate bowl, sift flour, baking powder and almond meal. Add castor sugar and combine.

4. Make a well in a centre and pour in the yoghurt mixture. Fold in gently using a rubber spatula,; do not over-stir, the mixture should be quite lumpy. Add the raspberries and fold in to just incorporate.

5. Spoon mixture into pans, filling each about three-quarters full. Sprinkle the flaked almonds evenly over the top of the cupcakes. Bake for 25 minutes, or until the cupcakes spring back when pressed. Should be slightly browned.

IMG_0523

6. Remove cupcakes from the trays immediately and cool on a wire rack for 30 minutes before frosting.

Decoration
Ingredients
1 cup icing sugar
Food Colouring: Brown and Yellow
24 White Sugar medallions
Piping Bag
Star Tip #9
1 Cup Vanilla Buttercream (Page 142)
Gold Glitter

Method

1. Sift icing sugar over the cooked cupcakes.

2. Add one drop of brown food colouring to ten drops of yellow food colouring to make a gold colour. Place an unused absorbent kitchen cloth onto a piece of greaseproof paper, and pout the gold colouring onto it, letting it absorb evenly. You can now use the cloth as a stamp pad. Stamp a gold letter B onto each of the sugar medallions (You may need two quantities of the gold food colouring)

3. Pipe a small swirl of buttercream in the centre of each cupcake. Place a medallion on top of each swirl and sprinkle with gold glitter.

Vanilla Buttercream Frosting
Ingredients
200g softened unsalted butter
1/2 cup milk
1 tablespoon vanilla extract
8 cups icing sugar

Makes: 4 cups of frosting (24 cupcakes)

Method
1. Cream the butter for 1-2 minutes. Add milk, vanilla extract and half of the sifted icing sugar, and beat for at least 3 minutes or until the mixture is light and fluffy. Add the remaining icing sugar and beat for a further 3 minutes or until the mixture is light and fluffy and of a spreadable consistency. Add extra milk if the mixture is too dry or extra icing sugar if the mixture is too wet.

2. If you wish to colour and/or flavour the buttercream then this is the time to do it.

IMG_0531

Impressions

What I liked about this recipe is the crunchiness from the slivered almonds on top, and the moist almond meal inside but also the sourness of the berries shines through. I used a mix of raspberries and blueberries that gave it that sweetness and sourness, as not to make it too sweet when you’re adding sugar to it anyway. The yoghurt gives it a denser texture but it makes it more moist. I think if it just used butter, the recipe would come out dry and unappetising. Another fantastic recipe from this recipe book.