Raspberry Soufflé (Vincent Gadan Recipe)

IMG_5214
On French Food Safari on SBS, Vincent Gadan made this amazing looking soufflé. Looked light and fluffy, and the host Maeve O’Meara seemed overly pleased with it too. Having only attempted a Chocolate Soufflé previously, I thought it was a fantastic idea to use raspberries instead of the incredibly rich chocolate or cheese for a soufflé. Have a look below!

Raspberry Soufflé (Vincent Gadan Recipe)
Serves 4

Preparation Time
30 minutes

Cooking Time
25 minutes

Ingredients
softened butter
freeze-dried raspberry powder (see Note)
2-3 punnets of raspberries (I used frozen raspberries but for decoration fresh is preferable)
1 tbsp water
50 g caster sugar
1 tsp (heaped) cornflour
1 lemon, juiced
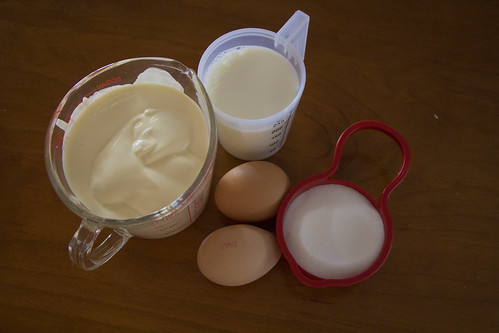
4 egg whites (125 g)
icing sugar, to dust
rose petals, to serve

IMG_5191

Instructions

1. Butter 4 individual soufflé dishes, coating well. Add a generous sprinkle of freeze-dried raspberry powder (or just caster sugar) to each dish and tilt the dishes until the powder covers the butter.

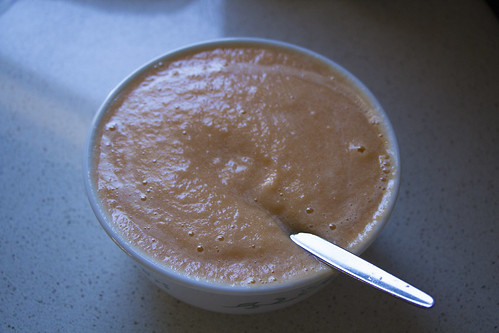
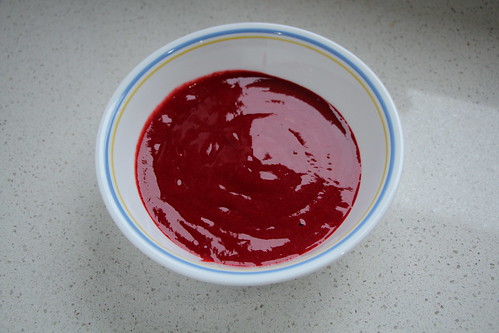
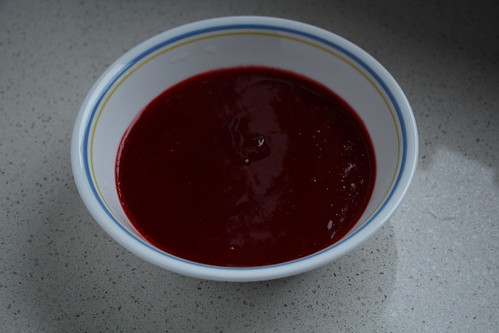
2. Reserve 12 fresh raspberries for decorating the soufflés. Put the rest in a blender and blend to a purée. Sieve the purée and measure out 170 g.

IMG_5192

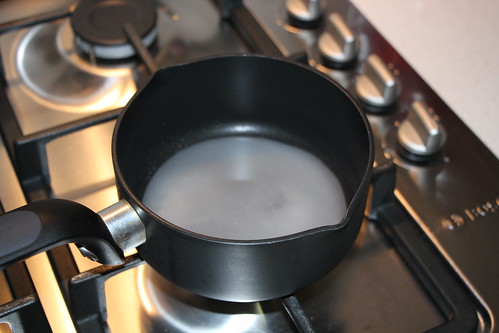
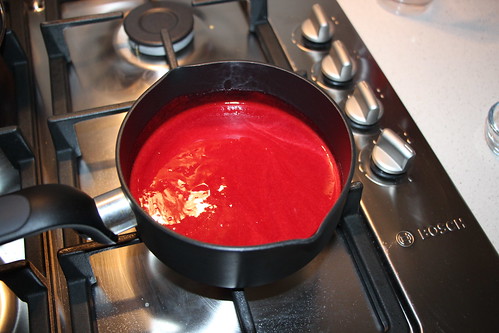
3. Put the water and 30 g of the sugar in a saucepan and heat, stirring, until the sugar dissolves. Mix the cornflour with the lemon juice in a small bowl and add to the sugar syrup along with 170 g of raspberry purée. Bring to the boil and cook for around 30 seconds, until the mixture thickens. Remove from the heat and leave to cool.

IMG_5195IMG_5196IMG_5198

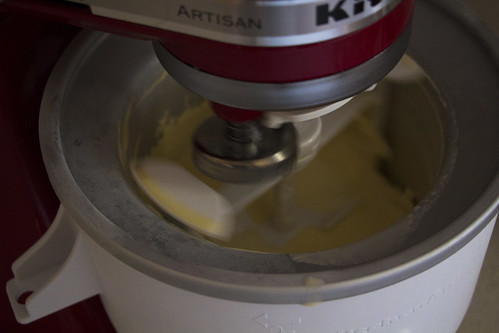
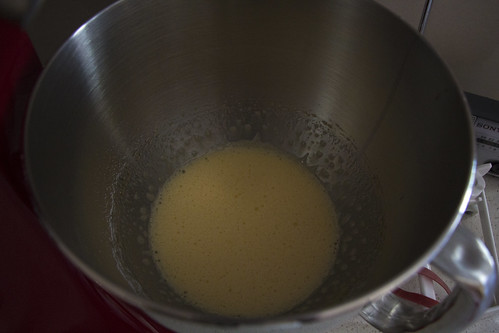
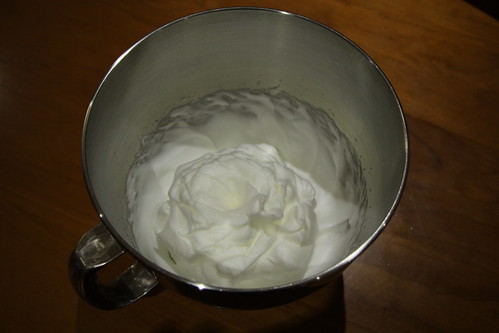
4. Preheat the oven to 200°C. Start whisking the egg whites – either by hand or with an electric mixer. Whisk to soft peaks, then add the remaining sugar and keep whisking to a firm meringue.

IMG_5202

5. Whisk a spoonful of the egg whites through the cooled raspberry mixture until thoroughly combined. Use a spatula to gently fold the raspberry mixture through the bowl of remaining egg whites until there is no egg white visible.

6. Spoon the mixture into the dishes, filling right to the top. Tap the dishes gently to remove any air pockets, and smooth the tops.

IMG_5206

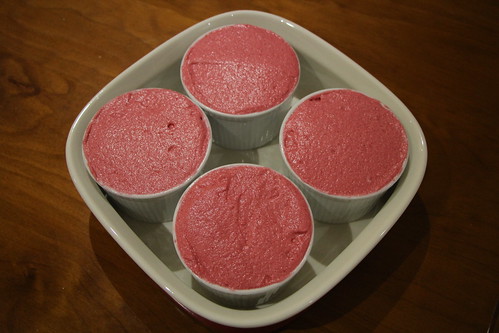
7. Place the soufflés in a deep dish and fill with cold water to halfway up the sides of the dishes. Bake in the oven for 10–12 minutes, until well risen and lightly golden on top.

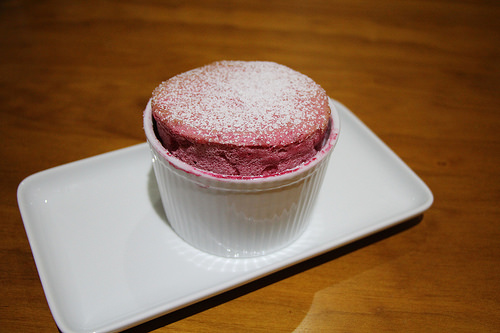
8. Immediately dust the soufflés with icing sugar and decorate the tops with the reserved fresh raspberries and a rose petal on each. Serve with the remaining raspberry purée, breaking the surface of your soufflé to pour it in.

IMG_5212

Impressions

The time consuming part was sieving the purée to get rid of all the seeds because I didn’t have a particularly good sieve, however I think it managed to come together in the end. My only concern was that the soufflé was very sour! The raspberries were extremely tart, so the 50g of sugar probably wasn’t enough in my situation. I’d probably have gone with 150g caster sugar as to be honest I couldn’t really find much sweetness in it. Maybe it’s supposed to be like that, I’m not too sure but I’d prefer some sweetness to come through at the very least.

This raspberry soufflé is also different to the chocolate soufflé which I found to be like a light cake of sorts. The raspberry soufflé on the other hand is wetter in texture, and while the outside will be firm, inside it’s moist and almost pudding like in terms of texture. Worth a try though, hey.

Cantaloupe Ice Cream (Ben & Jerry’s Recipe)

IMG_5142E

My love for ice cream knows no bounds. Being able to create my own ice cream from ingredients I’m familiar with is something I’ve always wanted to do as I love making things from scratch (if it isn’t too troublesome that is). Last year, I purchased the KitchenAid Ice-Cream maker attachment and have been giddy with excitement waiting for Summer to come to test it out. Having also bought the Ben & Jerry’s Homemade Ice Cream & Dessert Book, it was a good time to give it a go.

IMG_5111E

Cantaloupe Ice Cream
Makes 1 quart (~946ml)

Ingredients
1 large or 2 small cantaloupes (very ripe)
Juice of 1 lemon
Sweet Cream Base (below)

IMG_5101EIMG_5103E

Method
1. Cut the cantaloupe in half and clean out the seeds. Scoop the fruit into a mixing bowl, add the lemon juice, and mash until the fruit is pureed. Drain the juice into another bowl and reserve. Cover the melon puree and refrigerate

2. Prepare the Sweet Cream Base and whisk in the fruit juice

3. Transfer the mixture to an ice cream maker and freeze  following the manufacturer’s instructions

IMG_5107E

4. After the ice cream stiffens (about 2 minutes before it is done), add the cantaloupe. If more juice has accumulated, do not pout it in because it will water down the ice cream. Continue freezing until the ice cream is ready.

Sweet Cream Base

Makes 1 quart (~946ml)

Ingredients
2 Large eggs
3/4 cup Sugar
2 cups Heavy or whipping cream
1 cup Milk

IMG_5100E

Method
1. Whisk the eggs in a mixing bowl until light and fluffy, 1 to 2 minutes.

IMG_5105E

2. Whisk in the sugar, a little at a time, then continue whisking until completely blended, about 1 minute more.

IMG_5106E

3. Pour in the cream and milk and whisk to blend

Impressions

The recipe is a little vague in the quantity of cantaloupe to include, if you’re unsure add a bit less (much less than my pictured cantaloupe puree actually). Even our small cantaloupes here result in a great deal of puree so add a bit at a time to ensure the cream base stiffens when it’s churning otherwise you may end up with a mixture too soft to become ice-cream. Mine didn’t set too firm when churning unfortunately, but still flavourwise it’s delectably rich, yet full of cantaloupe flavour. A great recipe that just needs more specific quantities to make it work 100% of the time.


Spanish Baked Eggs (Ms I-Hua Recipe)

IMG_5153E

Having wanting to make Spanish Baked Eggs after being exposed to it here and here.  It really does seem like a simple, yet delicious breakfast, brunch or even lunch dish that you can whip up yourself in minimal time. I found this recipe from Ms I-Hua which looked so inviting that I definitely had to give it a try. After making some tacos, I had left over corn and capsicum which I just added in and came out quite well might I add.

Spanish Baked Eggs & Chorizo (Recipe by Ms I-Hua)

Ingredients:
4 mid-large Eggs (room temperature)
1 mid-sized SpicyChorizo (sliced diagonally)
1 can (400g) of Diced Tomatoes
1 can (400g) of Cannellini Beans or Butter Beans (washed and drained) – I used mixed beans
1/2 can (200g) of Sweet Corn Kernels
1/2 Red Capsicum (diced)
1 French Shallot (diced)
2 Garlic Cloves (diced)
1/2 tsp of Smoked Paprika
1/4 tsp of Ground Cumin
1/4 tsp of Cayenne Pepper
1 tsp of Parsley Flakes
1 Tbsp of Ketchup
Salt & Pepper to taste
1 Tbsp of Olive Oil
Handful of Mozarella or Cheddar cheese shredded

IMG_5144E

Method
1. Preheat your oven to 200°C (degrees Celsius).

2. In a pan, heat olive oil on medium heat and add in diced garlic and French shallots. Cook until fragrant but careful not to burn them.

3. Add diced tomatoes, cannellini/butter beans, chorizo slices, capsicum, smoked paprika, ground cumin, cayenne pepper and ketchup. Cook for about 6-8 minutes till it reduces slightly. Add in the chorizo slices (Ms I-Hua’s recipe suggests you can add them in now or just before placing the dishes in the oven)
IMG_5147E

4. Turn heat off and add in parsley flakes with salt and pepper to taste.

5. Transfer into individual cazuelas (terracotta dish) or baking dishes.
IMG_5150E

6. Make a well in the middle and break an egg into each dish. You can add some cheese on top as well before placing in the oven.
IMG_5151E

7. Place each dish into the oven and cook for 8-12 minutes depending on how you want the yolk (oozy or solid). It will take longer to cook if the eggs are straight from the fridge.
(Ms I-Hua Note: It’s best to keep an eye out on the yolk as different ovens and baking dishes/cazuelas (flat or tall) may vary in cooking time)

IMG_5152E

8. Once the baked eggs are done, take them out of the oven carefully (it’s hot!) and sprinkle with a little more salt and pepper. Garnish with fresh chervil or parsley and some cheese if preferred. Serve with a slice of sour dough bread
IMG_5154E

Impressions
I loved this recipe. It’s especially fragrant and the right amount of spices. I kinda used this recipe to use up all my other leftover ingredients which suited the recipe here actually. The cheese gave it an added richness but you can always do without it.

I must admit I over cooked the eggs, but it still came out pretty well in the end. I’d also prefer more diced tomatoes in the mix, to give it a bit more sauce though. Would definitely recommend this recipe to others, you’d be amazed at how the simplest spices of paprika, cayenne pepper and cumin (in such small quantities) can really burst out in flavour and create a genuine crowd pleaser.

Lemon Macarons

DSC00309

 I love lemons and when I make something new, if there is a way to add lemons to it I will. I made Lemon Macarons with Lemon Curd and they turned out quite well if I don’t say so myself. I remember making macarons again and again but never could get those damned feet until I switched to the Italian Meringue method. This was my only success with French Meringue. Check out the recipe from Tartelette Blog with the Lemon Curd recipe from Taste.com.au.

Lemon Macarons (Tartelette Blog) with Lemon Curd

French Meringue Macarons

Ingredients

Makes 50 to 60 shells, for 25 to 30 filled macarons.
2¾ cups (8.8 ounces/250 grams) almond flour
2¾ cups (12.4 ounces/350 grams)
powdered sugar
1 cup egg whites (from 7 or 8 eggs),
at room temperature
Pinch of salt
2 teaspoons powdered egg whites, if weather is humid
¾ cup (5.3 ounces/150 grams) superfine granulated sugar
5 to 7 drops gel paste food coloring (optional) (I used 2 teaspoons lemon zest instead)

Method

1. Preheat the oven to 300°F (325°F for a non-convection oven) 150°C, and line your baking sheets with parchment paper.

2. Blend the almond flour with the powdered sugar in your food processor to make a fine powder (or sift together, discarding any large crumbs and adding a bit more almond flour and powdered sugar as needed to compensate). Then sift the mixture through a strainer until it is as fine as you can get it. This keeps crumbs from forming on the macaron tops as they bake.

3. With the wire whip attachment on the electric mixer, beat the egg whites with the salt and the powdered egg whites (if you are using them), starting slowly and then increasing speed as the whites start to rise. Add the granulated sugar and the food coloring. Beat until the egg whites form stiff peaks and your meringue is firm and shiny.

4. Pour the beaten egg whites onto your almond flour mixture and gently fold them in, using a rubber spatula. Move your spatula from the bottom of the bowl to the edges with one hand, using your other hand to rotate the bowl. Now slap the sides of the bowl until the batter falls in a wide ribbon when you raise your spatula. When you can’t see any crumbs of almond flour and the mixture is shiny and flowing, you are ready to start piping.
The French have a special word—macaronner—to describe the physical action of mixing all the ingredients for macarons. This has to be done by hand. You cannot do it with your mixer—you must be able to feel the consistency of the macaron batter.

5.  Fit your pastry bag with a number 8 tip and fill with batter. Start by squeezing out a small amount of mix onto a parchment-lined baking sheet to form a 2½-inch circle. Be sure to leave 1 inch of space between macarons so they will not touch each other while they bake.
If the peak that forms on the top of the macaron does not disappear after piping, it means the batter could have been beaten a little more. Tap the baking sheet on the tabletop, making sure to hold the parchment paper in place with your thumbs.
Let the piped macarons rest for 15 minutes.

6. Bake for 14 minutes at 300°F/ 150°C. After the first 5 minutes, open the oven door briefly to let the steam out.
Let the macarons cool completely on a rack before taking them off the parchment paper. Press the bottom of a cooled baked macaron shell with your finger; it should be soft. If the bottom of the shell is hard, reduce the baking time for the rest of your macarons from 14 minutes to 13 minutes.
Using a pastry bag requires some practice. It may seem awkward at first, but you’ll soon get the hang of it.

Prepare the bag (if it hasn’t been used before) by cutting about 2 inches off the narrow end—just enough so that when you insert a number 8 decorating tip, about a third of the tip extends outside the bag. Push the tip firmly in place and spoon in your filling, leaving enough room at the top to twist the bag shut. It is best to fill the bag with half of the batter at a time, that way it is not too heavy. To make it easier to fill your pastry bag, place it upright in an empty jar or other straight-sided container. This will help steady the bag while you fill it with batter.
Squeezing the bag slowly, pipe each macaron shell out in a single dollop. Lift the bag quickly to finish.

Lemon Curd (Taste.com.au)
Ingredients
2 eggs, plus 2 egg yolks
3/4 cup (165g) caster sugar (Half sugar to 80g)
1/3 cup (80g) chilled unsalted butter
Zest and juice of 2 lemons

Method
1. Whisk whole eggs, yolks and sugar in a saucepan until smooth, then place pan over a low heat.
2. Add the butter, juice and zest and whisk continuously until thickened. Strain through a sieve into a sterilised jar. Lemon curd keeps, covered, in the fridge for 2 weeks.

Impressions

This was the first time I made macarons and they came out with feet! I don’t know what happened with the proportions for the shell because I recall reducing the icing sugar to half but it ended up extremely sweet anyway! Maybe I didn’t reduce the sugar at all haha. I loved the lemon curd, it was perfectly sweet and sour with that lemon aftertaste tang. Lovely.

Lasagne (Taste.com.au)

DSC00306

Lasagne, Italian but as common as a hot dog or meat pie in Australia. I have a strong dislike for those frozen Lasagne packets, or those in the foil, they taste so artificial, lots of cheese and strange mince meat. Ever since I tried making lasagne for myself, I can never go back to the store-bought versions. The Taste.com.au recipe works a treat, isn’t too complex but still requires a few different procedures but well worth it.

“Our Favourite Lasagne Recipe” (Taste.com.au)

Preparation Time
20 minutes

Cooking Time
80 minutes

Ingredients (serves 8)

Mince Mixture
2 tsp olive oil
1 brown onion, halved, finely chopped
2 garlic cloves, crushed
750g beef mince
2 x 400g cans Italian diced tomatoes
125ml (1/2 cup) dry red wine
55g (1/4 cup) tomato paste
Salt & freshly ground black pepper
Bechamel (Cheese) sauce
1L (4 cups) milk
1 brown onion, halved, coarsely chopped
8 fresh parsley stalks
8 whole black peppercorns
4 whole cloves
2 bay leaves
60g butter (Cooking Margarine can be used instead)
50g (1/3 cup) plain flour
70g (1 cup) finely grated parmesan
Pinch ground nutmeg
Salt & ground white pepper
Optional: Dried chilli flakes

Olive oil, extra, to grease
4 fresh lasagne sheets (Or cannelloni sheets but they are smaller and harder to use)
55g (1/2 cup) coarsely grated mozzarella
Mixed salad leaves, to serve

Method

Mince Mixture

1. Heat the oil in a large frying pan over medium heat. Add the onion and garlic and cook, stirring, for 5 minutes or until onion softens. Add the mince and cook, stirring with a wooden spoon to break up any lumps, for 5 minutes or until mince changes colour.

2. Add the tomato, wine and tomato paste, and bring to the boil. Reduce heat to low. Simmer, uncovered, stirring occasionally, for 30 minutes or until sauce thickens slightly. Remove from heat. Taste and season with salt and pepper.

Cheese Sauce

3. Meanwhile, to make the cheese sauce, combine the milk, onion, parsley stalks, peppercorns, cloves and bay leaves in a medium saucepan and bring to a simmer over medium heat. Remove from heat and set aside for 15 minutes to infuse.

4. Strain the milk mixture through a fine sieve into a large jug. Discard solids.

5. Melt the butter in a large saucepan over medium-high heat until foaming. Add the flour and cook, stirring, for 1-2 minutes or until mixture bubbles and begins to come away from the side of the pan. Remove from heat.

6. Gradually pour in half the milk, whisking constantly with a balloon whisk, until mixture is smooth. Gradually add the remaining milk, whisking until smooth and combined.

7. Place saucepan over medium-high heat and bring to the boil, stirring constantly with a wooden spoon, for 5 minutes or until sauce thickens and coats the back of the spoon. Remove from heat. Add the parmesan and stir until cheese melts. Taste and season with nutmeg, salt and white pepper.

Layering

8. Preheat oven to 180°C. Brush a rectangular 3L (12 cup) capacity ovenproof dish with oil to lightly grease. Spread one-quarter of the bechamel sauce over the base of the prepared dish. Arrange 1 lasagne sheet over the sauce. Top with one-third of the mince mixture and one-third of the remaining bechamel (Cheese sauce) sauce. Continue layering with the remaining lasagne sheets, mince mixture and bechamel, finishing with a layer of bechamel. Sprinkle with mozzarella. Place on a baking tray. Bake in preheated oven for 40 minutes or until cheese melts, is golden brown, and the edges are bubbling. Remove from oven and set aside for 10 minutes to set.

9. Cut the lasagne into 8 portions and serve with mixed salad leaves.


Impressions

Making lasagne is like making a tomato based pasta sauce halfway as the mince mixture is not as wet but the flavours of it and procedure is basically the same and yes I do add chilli flakes in there too.

The cheese sauce needs a bit more watching as to avoid the milk mixture from frothing over the saucepan so be careful. The other focus point is when pouring the flour into the butter mixture, it can stick to the bottom of the saucepan/pot that you are using.

I love the bechamel sauce that it makes, it’s so flavourful unlike those take-away sauces. I know it’s an unfair comparison but that’s what most people are used to eating.

We actually used cannelloni sheets because we had some left over but they work just as well as lasagne sheets, but I think they are just a tad smaller so the sauce kinda seeps through when layering. Just layer twice and cover the gaps and it should be fine. I really do enjoy making lasagne and this recipe in particular, and the layering part is fun for kids too!

Chocolate Cocoa Cupcakes

IMG_0545

On our little cupcake baking frenzy, we decided to make some chocolate cupcakes. We found a recipe in the The Crabapple Bakery Cupcake Cookbook by Jennifer Graham, you can buy the recipe book here and check out their website and details on the official website. Their actual cupcakes are quite different to what we’ve decided to make, because we didn’t make the icing/toppings or add the little rock chocolates. However the cupcake itself is the same, apart from reducing the sugar but I’ve listed the entire recipe along with what you need to do for the decorations as they do look quite fancy.

Dinosaur Rock Cupcakes – Chocolate Birthday Cakes

Makes: 24

Ingredients
3 cups plain flour
2 teaspoons bicarb soda
1 teaspoon baking powder
1 teaspoon salt
3 tablespoons instant coffee granules
1 cup hot water
1 cup cocoa
1 cup cold water
200g softened unsalted butter
1 1/2 cups castor sugar
4 eggs
1 tablespoon vanilla extract
Icing sugar for dusting

Method
1. Preheat oven to 170C. Line two 12-hole muffin trays with chocolate-coloured cupcake papers

2. Sift together the flour, bicarb of soda, baking powder and salt. In a separate bowl whisk together the coffee, hot water,and cocoa until you have a smooth paste. Add the cold water and whisk until evenly combined.

3. In a separate bowl, creaming the butter for 1-2 minutes. Add the castor sugar a third at a time, beating for 2 minutes after each addition. After the last addition, beat until the mixture is light and fluffy and the sugar has almost dissolved. Add eggs one at a time, beating for 1 minute after each addition or until mixture is light and fluffy. Add the vanilla extract and beat until combined.

4. Add a quarter of the flour to the creamed mixture and beat on low speed until combined. Add a third of the cocoa mixture and beat until combined. Repeat this process twice more. Add the remaining quarter of the flour and beat until thoroughly combined, do not over-beat as this will toughen the mixture.

5. Spoon mixture into cupcake papers, filling each about three quarters full. To prevent the cupcakes cracking on top, allowing the mixture to sit in the cupcake papers for 20 minutes before baking. Bake for 18-20 minutes or until a fine skewer inserted comes out clean.Remove cupcakes from the trays immediately and cool on a wire rack for 30 minutes before frosting.

6. If you prefer no icing, and for simplicity, just dust some icing sugar over cooled cupcakes. Looks like Christmas!

Decoration
1 quantity Vanilla Buttercream
Food Colouring: Apple-Green, Wilton’s Buttercup Yellow
24 Dinosaur/star candles
Chocolate Sprinkles
Chocolate Rocks

1. Divide the buttercream into two small bowls.Add a couple of drops of apple-green food colouring to one bowl and a couple of drops of yellow to the other. Mix to create even colours.

2. Frost half the cupcakes with the yellow buttercream, add half with the green. Working quickly, before the buttercream dries, top each cupcake with a candle, and decorate with sprinkles and chocolate rocks.

IMG_0544

Impressions

The recipe itself is quite nice, the cupcakes are as light as a butter cupcake can be. I found the taste of chocolate to be very mild, as it only uses cocoa powder. I couldn’t really taste the coffee either, I think it’s because our coffee granules have been oxygenated for too long and it has lost most of its coffee aroma. I think I’d prefer a chocolate cupcake to use actual melted chocolate in its recipe because you can really taste the difference when one uses cocoa or chocolate.

Other than that it’s a simple recipe, but if you went all out with decorations, I’m sure it would have tasted even better.

Mocha Chiffon Cake (Gourmeted Goldilocks Recipe)

IMG_0357

I was searching high and low for a nice looking Mocha Cake to bake for my mother. I came across Gourmeted’s Goldilocks Mocha Cake Recipe which looked fantastic. I’ve tried this a few times following the exact method however on both occasions my cake sank like a rock. One my third attempt I thought, why not use the tried and tested Chiffon Cake way. Here is my slightly adapted Gourmeted recipe below. A big thanks to Gourmeted because it’s a fantastic recipe.

Mocha Cake ala  Goldilocks (Gourmeted)
Ingredients

For the Cake:
6 large egg yolks, at room temperature
1 cup sugar
1 teaspoon coffee/espresso granules [Nescafe instant coffee recommended]
1 teaspoon cocoa powder
1 teaspoon vanilla
1 teaspoon water
½ cup canola oil
1 cup cake flour
1 teaspoon baking powder

6 egg whites, at room temperature
1 teaspoon cream of tartar

For the Mocha Buttercream
1 cup sugar
4 large egg whites, at room temperature
3 sticks (12 ounces) unsalted butter, soft, at room temperature
1 teaspoon coffee/espresso granules
1 teaspoon cocoa powder
5 teaspoons water
1 teaspoon vanilla extract
5 teaspoons amaretto (Or Kahlua)
Tools & Equipment

Stand mixer (preferred) but a hand mixer will be sufficient
1 Chiffon cake baking tin

Preparation

1. For the Cake: Preheat oven to 375°F (~160 C)

2. Whisk together egg yolks and sugar in a large bowl (or bowl of a stand mixer) over low, then medium speed, until creamy and light yellow in color.

3. Dissolve espresso or coffee granules and cocoa powder in water and vanilla in a small bowl, getting rid of lumps while stirring. Pour into the egg-sugar mixture, along with canola oil, and beat until well combined.

4. Remove large bowl from stand mixer (if using one) and sift cake flour and baking powder over it. Stir with a wooden spoon until well blended, scraping the sides of the bowl once.

5. Whisk egg whites and cream of tartar into stiff peaks in a medium bowl, and fold into the mocha batter, a dollop or two first to liquefy the thick batter, and then in thirds.

6. Place the batter in the pan. Bake on two racks for 30 to 40 minutes. The cake is done when the tops become golden brown and the cake tester comes out clean when inserted in the middle.

IMG_0350

7. Once ready, take out of the oven and cool upside down on a mug. If you want to make the icing, the cake must be left to cool completely.

IMG_0353

8. For the Buttercream: Whisk sugar and egg whites for 3 to 5 minutes in a medium heatproof bowl set over a saucepan of simmering water (water should not touch the bottom of the bowl), until meringue is hot to the touch. The sugar granules will be dissolved and you will be left with a fluffy marshmallow cream-like froth.

9. Remove bowl from heat and beat for 5 minutes with a hand mixer set to medium speed, or pour into a bowl of a stand mixer with a whisk attachment to mix.

10. Add half of the butter and beat with a hand mixer (or paddle attachment for stand mixer) until smooth before adding the next half to combine. Scrape the sides of the bowl with a spatula and give it a quick stir. Beat again on medium-high for another 6 to 10 minutes to thicken.

11. Dissolve cocoa and espresso/coffee granules in water, vanilla extract, and amaretto in a small bowl. Pour into the buttercream and beat for 2 minutes, scraping the sides at least once.

12. Spoon about ½ cup of frosting on top and spread it evenly with a flat metal spatula.Spread a thick layer of frosting over the side, working from the bottom up to the top. Frost the top by placing a mound of icing and spreading it to the side. You can decorate the cake with the remaining frosting as you wish.


IMG_0362

As you can see I didn’t do the icing this time around. I have done it previously and it is indeed delicious. I used Kahlua instead of Amaretto but I believe Amaretto gives it a nice almond flavour to it.

IMG_0359

Impressions

This  Mocha cake… I’m just going to call it a Mocha Chiffon Cake is beautifully soft. I put it only for roughly 30/35 minutes, just done and it is as moist as ever. If you’re a fan of Chiffon Cakes, and want a slight coffee hit. This is for you! I think if you try the Gourmeted way, you may still find success, it’s just that I used a hand mixer on my previous two attempts. My planetary stand mixer works wonders with egg whites and is excellent in producing stiff peaks so that could be the reason why I found success on my third attempt.

This is slightly smaller than my Orange and Pandan Chiffon Cakes, as it only uses 6 eggs, but it’s still quite nice as you can see. It’s just a tad shorter. I might try a Black Sesame Chiffon Cake sometime because I seriously can’t get enough of Black Sesame.


Orange Chiffon Cake

IMG_5914

After baking my first Pandan Chiffon Cake, we decided to try baking the Orange Chiffon Cake. Usually Pandan and Orange and they two popular versions in Melbourne. I’m really not sure of many other versions, I’ve seen someone do a Black Sesame one but haven’t had a chance to try that yet.

The difference between the Pandan and Orange Chiffon Cake recipes is the Orange version tastes much lighter because  of the use of coconut milk in the Pandan recipe which makes it slightly more dense. Without further adieu here is my mother’s recipe which works a treat!

Orange Chiffon Cake
Ingredients

8 egg whites
100 g sugar
1/2 tsp cream of tartar

8 egg yolks
60 g sugar

180 g self-raising flour (or 160 g plain flour and 20g cornflour)

1/2 tsp salt
1 1/4 tsp baking powder

120ml vegetable oil/corn oil
80ml orange juice

1 tsp orange extract

Method
1. Preheat oven to 160/170 degrees Celsius.
2. Sieve the flour, salt and baking powder into a medium sized bowl.
3. Add the vegetable oil, orange juice, orange extract, egg yolks and sugar into the dry ingredients and mix until just combined.
4. Whip the egg whites and once it starts to bubble add the cream of tartar.
5. Keep whipping until the mixture is nearing soft peaks, then slowly add the sugar with the electric mixer is still running and until hard peaks form.

IMG_5891
6. Add 1/3 of the meringue into the wet mixture until the thick mixture softens. Then slowly add in the rest of the meringue until just combined. Do not overmix!
7. Pour into the cake pan (one made for upside down cakes – it has a hole in the middle)
8. Place in the oven for 30/40 minutes. If the top of your cake gets brown too quickly, lower the oven temperature to around 150. To see if it’s done, you can use a skewer and poke it through the middle. If it comes out clean, it’s done.

IMG_5898
9. Remove from the oven when done, and flip it upside. If the cake as risen higher than the cake pan’s height, use a mug and rest the middle cylinder on top.

IMG_5940
IMG_5904
10. Allow the cake to cool until room temperature.

IMG_5916

Here’s how it looks inside!

IMG_5951

I find that you’ll always have a slight depression and density at the bottom because of the meringue cooling. You’ll be hard pressed to find a Chiffon cake that doesn’t sink a bit so don’t worry if yours does. It’s fine!

IMG_5949

Impressions

I find the Orange Chiffon Cake to be extremely light, but full of orange flavour. The orange juice really adds the much needed freshness and flavour. It really will depend on the oranges and how ripe they are but a little bit of orange extract is good just in case the orange juice doesn’t do its job.

Using a stand mixer really makes a difference to a hand mixer. I find the hand mixer either overbeats the meringue, or doesn’t evenly beat the egg whites. Maybe it’s just my poor hand mixing but with a stand mixer and especially a planetary mixer, you get hard peaks extremely quickly and without much fuss. The key in making a good Chiffon Cake is obtain hard peaks and carefully mix it in with the batter but just enough. Once you’ve tried it a couple of times, you’ll know how hard/gentle to mix and after that it really does become easy to make.

If you love light, fluffy cakes  and you don’t want a buttery aftertaste, Chiffon Cakes are excellent for your cake fix.

Pandan Chiffon Cake

IMG_5873

Chiffon Cake was invented in America but have remained popular in South-East Asian countries, and extremely popular in Malaysia. The most popular versions are Orange or Pandan/Coconut Chiffon Cakes and are enjoyed by many for its light and fluffy texture. Here is a version of my Pandan Chiffon Cake. Chiffon Cakes sometimes take a couple of tries to get right due to different oven temperatures and the mixing of the meringue and wet mixture so if you don’t succeed on your first try. Please try again!

Pandan Chiffon Cake
Ingredients

7 egg whites
100 g sugar
1/2 tsp cream of tartar

7 egg yolks
60 g sugar

190 g flour
1/2 tsp salt
2 tsp baking powder

80ml vegetable oil
140ml coconut milk
1/2 tsp pandan extract

Method
1. Preheat oven to 160/170 degrees Celsius.
2. Sieve the flour, salt and baking powder into a medium sized bowl.
3. Add the vegetable oil, coconut milk, extract, egg yolks and sugar into the dry ingredients and mix until just combined.
IMG_5851
4. Whip the egg whites and once it starts to bubble add the cream of tartar.
5. Keep whipping until the mixture is nearing soft peaks, then slowly add the sugar with the electric mixer is still running and until hard peaks form.
IMG_5855
6. Add 1/3 of the meringue into the wet mixture until the thick mixture softens. Then slowly add in the rest of the meringue until just combined. Do not overmix!
7. Pour into the cake pan (one made for upside down cakes – it has a hole in the middle)
8. Place in the oven for 30/40 minutes. If the top of your cake gets brown too quickly, lower the oven temperature to around 150. To see if it’s done, you can use a skewer and poke it through the middle. If it comes out clean, it’s done.
9. Remove from the oven when done, and flip it upside. If the cake as risen higher than the cake pan’s height, use a mug and rest the middle cylinder on top.
IMG_5871
10. Allow the cake to cool until room temperature.

IMG_5878

Impressions
What I like about this recipe is how light the chiffon cake is. When you take a bite, the cake just melts in your mouth. Not to inflate my ego or anything but I found it better than those purchased in my local Asian Grocers. This recipe isn’t too sweet, but still has that nice and subtle pandan flavour. You can always increase or decrease the amount of pandan extract you put it, as well as the coconut to whatever you prefer. That’s the fun thing about making things yourself, you can make something just to your liking.

If your chiffon cakes sinks slightly when cooling, that’s fine. All cakes shrink slightly when cooled. If your cake shrinks too much, this may be a result of over mixing for the batter or the meringue. Or even under mixing for the meringue.

IMG_5884

I find that if you use a good stand mixer, it’s much easier to make the meringue and definitely more consistent than using a hand held mixer. It’s also less troublesome to try pouring sugar into the egg whites if you use a stand mixer (I know, I’ve tried)

All in all, Chiffon cakes can be slightly difficult but once you get the basics down, you’ll find it isn’t so hard after all.

Green Tea Mochi with Red Bean and Black Sesame

IMG_6912

Mochi is a Japanese treat that is made from glutinous rice flour and is usually slightly chewy and soft with an assortment of fillings inside. In most offerings, red bean paste is used. Although more commonly known as a Japanese food, it is known to be popular in other Asian countries with their own twists or variances.

What goes best with red bean? Grean Tea.

I’ve adapted this recipe from Belachan2 and have made my usual  changes to the recipe to suit my own tastes.

Green Tea Mochi with Red Bean Filling
Ingredients
1 cup glutinous rice flour
1/2 tsp. green tea powder (for baking)
150ml water
1 tbs sugar

Red bean paste for filling (Recipe below)
Black sesame paste for filling (Recipe below)

Cornstarch for dusting (microwave cornstarch for 2 mins, let it cool completely before using) – Or you can light heat up the glutinous rice flour in a pan for a couple of minutes (don’t burn) and let it cool to room temperature.

Method

1. In a glass bowl, combine flour, green tea powder and water. Stir to mix well. Then add in the sugar, stir til sugar dissolved.

2. Cover with a plastic wrap and microwave for 2 minutes. Remove and stir well. Return to microwave for another 30 seconds. Stir-well and check for doneness. If not, put it back for another 30 seconds, be careful not to burn it.

3. Flour the working surface with cornstarch and use a spoon to drop a ball of mochi on top and quickly cover it with starch. Divide into 8 or 10 pieces. Wrap the filling inside and cover with more cornstarch. Shape into balls and ready to serve.
IMG_6911

Red Bean Paste (From JustHungry)

Ingredients
2 cups washed azuki beans
3/4 to 1 cup sugar
1/2 tsp sea salt

Method
1. Soak the beans in cold water to cover for 24 hours.

2. Drain the beans and put them in a pot with water to cover. Bring the water to a boil, boil for a minute then drain the beans. Rinse the beans briefly under cold running water and drain again. Put the beans back in the pot with fresh cold water, bring to a boil, then drain and rinse again. This twice-boiling gets rid of much of the surface impurities and makes the an taste cleaner.

3. Put the beans back in the rinsed pot, and add enough water so that it comes up to about 2cm/1 inch above the beans. Bring to a boil, then lower the heat to a low simmer. Add water if it boils away. Skim off any scum on the surface. Cook until the beans are completely cooked and falling apart. Drain the beans, reserving the cooking liquid.

4. Put the pot of beans back on medium-low heat. Add the sugar and salt in 3-4 batches, while stirring with a wooden spoon or spatula to distribute the sugar and salt evenly. When the sugar melts, it will exude moisture, but if it seems a bit too dry or sticking to the pot, add a little of the reserved cooking liquid back in. Continue cooking while stirring occasiontaly, until the sugar is completely melted and absorbed into the beans. This step takes 10-15 minutes.

5. At this point the beans should be soft enough to mash easily with the side of your spatula. You can also use a potato mssher. Turn out onto a plate to let cool.

Rice Cooker Method (not exact)

1. Add around 250g washed azuki beans into a rice cooker
2. Fill the bowl with water until it covers all the beans
3. Let it cook in there for a couple of hours or until the beans start to soften
4. In the middle of cooking in the rice cooker, add sugar (up to you) and add a a couple of pandan leaves for flavour.
5. Once the beans are soft, you can either mash them together with a cooking utensil until smooth. If you want a really fine paste, you’ll probably need to put it through a sieve a couple of items or try a food processor.

Black Sesame Paste (Not exact)
Ingredients
100 g Black Sesame Powder
2 tbs Icing Sugar
1 tbs Butter/Margarine (Soft)

Method

1. Add all the ingredients together, you can use a whisk or a fork to mix until it forms a paste.
2. If it doesn’t mix properly, add slightly more margarine/butter and mix. Similarly, if it isn’t sweet enough for your liking, add more until it suits you.

Impressions

This recipe is fantastic if you like soft and slightly chewy Mochi but my first warning is if you cannot eat them all in the day (how can you not?) then it usually hardens overnight. There are a few recipes that won’t do this but I find them to be more dense and tougher to eat.

My second warning is that, the rice ball after heated up is extremely sticky. So add the flour to your hands, and on the plate/table. You’ll get the hang of it after a couple of tries but flour up each time as otherwise it can be a total disaster when you try putting in the filling. You can always eat the disasters so that’s a plus anyway. This is always my go to recipe and although I said it was tricky, it is a very simple process.

Mochi’s are like the Macarons of the East. The filling and the rice ball is all up to you! Enjoy!