Cranberry and White Chocolate Oatmeal Cookies

IMG_9242

One day I had the urge to make Cranberry and White Chocolate cookies, I think I’ve seen it in stores before but I had this idea that dried cranberries were small and diced. I was searching high and low for these cranberries but to no avail. I don’t even think they exist now. So instead I bought the usual dried cranberries which are a bit chunky. I came across this recipe from Rachel @ Simple Girl and they looked absolutely delicious.

Cranberry Oatmeal White Chocolate Cookies (Simple Girl)
Makes 4 dozen cookies

Ingredients

1 cup butter or margarine (softened) – I used margarine
1 cup firmly packed brown sugar (1/2 cup used)
1/2 cup granulated/caster sugar (1/8 cup)
2 eggs
1 teaspoon vanilla extract
1 1/2 cups all-purpose flour (or white, whole wheat flour) (I used all whole wheat flour)
1 teaspoon baking soda
1/2 teaspoon salt
3 cups oats
1 cup dried cranberries
1 cup white chocolate chips (Reduce this to 1/2 cup)

Method

1. Heat oven to 175 degrees Celsius.
2. Beat together margarine and sugars until creamy.
3. Add eggs and vanilla; beat well.
4. Add combined flour, baking soda and salt. Mix well.
5.. Stir in oats, dried cranberries and white chocolate chips.
6. Drop by rounded tablespoonfuls onto a parchment lined cookie sheet.

IMG_9241

7. Bake 8 – 9 minutes. (I prefer to slightly under bake until the tops just turn slightly brown.)

Impressions

I liked this recipe  but even after reducing the brown sugar and caster sugar it was still very sweet! I think it was because both the cranberries and white chocolate are already sweet. If I were to make these again, I would reduce the white chocolate to 1/2 cup as I put in 1 cup when I made these and the white chocolate was too plentiful. The oats can be slightly big so you may want to add them to a food processor give it a couple seconds whizz so the oats are a tad smaller.

These cookies with oats aren’t your typical crispy/crunchy type, because of the oats it makes it slightly soft so if you’re not fond of it then this might not be for you. Nonetheless it’s a tasty treat that makes you feel less guilty about eating them and very easy and quick to make.

Lemon Macarons

DSC00309

 I love lemons and when I make something new, if there is a way to add lemons to it I will. I made Lemon Macarons with Lemon Curd and they turned out quite well if I don’t say so myself. I remember making macarons again and again but never could get those damned feet until I switched to the Italian Meringue method. This was my only success with French Meringue. Check out the recipe from Tartelette Blog with the Lemon Curd recipe from Taste.com.au.

Lemon Macarons (Tartelette Blog) with Lemon Curd

French Meringue Macarons

Ingredients

Makes 50 to 60 shells, for 25 to 30 filled macarons.
2¾ cups (8.8 ounces/250 grams) almond flour
2¾ cups (12.4 ounces/350 grams)
powdered sugar
1 cup egg whites (from 7 or 8 eggs),
at room temperature
Pinch of salt
2 teaspoons powdered egg whites, if weather is humid
¾ cup (5.3 ounces/150 grams) superfine granulated sugar
5 to 7 drops gel paste food coloring (optional) (I used 2 teaspoons lemon zest instead)

Method

1. Preheat the oven to 300°F (325°F for a non-convection oven) 150°C, and line your baking sheets with parchment paper.

2. Blend the almond flour with the powdered sugar in your food processor to make a fine powder (or sift together, discarding any large crumbs and adding a bit more almond flour and powdered sugar as needed to compensate). Then sift the mixture through a strainer until it is as fine as you can get it. This keeps crumbs from forming on the macaron tops as they bake.

3. With the wire whip attachment on the electric mixer, beat the egg whites with the salt and the powdered egg whites (if you are using them), starting slowly and then increasing speed as the whites start to rise. Add the granulated sugar and the food coloring. Beat until the egg whites form stiff peaks and your meringue is firm and shiny.

4. Pour the beaten egg whites onto your almond flour mixture and gently fold them in, using a rubber spatula. Move your spatula from the bottom of the bowl to the edges with one hand, using your other hand to rotate the bowl. Now slap the sides of the bowl until the batter falls in a wide ribbon when you raise your spatula. When you can’t see any crumbs of almond flour and the mixture is shiny and flowing, you are ready to start piping.
The French have a special word—macaronner—to describe the physical action of mixing all the ingredients for macarons. This has to be done by hand. You cannot do it with your mixer—you must be able to feel the consistency of the macaron batter.

5.  Fit your pastry bag with a number 8 tip and fill with batter. Start by squeezing out a small amount of mix onto a parchment-lined baking sheet to form a 2½-inch circle. Be sure to leave 1 inch of space between macarons so they will not touch each other while they bake.
If the peak that forms on the top of the macaron does not disappear after piping, it means the batter could have been beaten a little more. Tap the baking sheet on the tabletop, making sure to hold the parchment paper in place with your thumbs.
Let the piped macarons rest for 15 minutes.

6. Bake for 14 minutes at 300°F/ 150°C. After the first 5 minutes, open the oven door briefly to let the steam out.
Let the macarons cool completely on a rack before taking them off the parchment paper. Press the bottom of a cooled baked macaron shell with your finger; it should be soft. If the bottom of the shell is hard, reduce the baking time for the rest of your macarons from 14 minutes to 13 minutes.
Using a pastry bag requires some practice. It may seem awkward at first, but you’ll soon get the hang of it.

Prepare the bag (if it hasn’t been used before) by cutting about 2 inches off the narrow end—just enough so that when you insert a number 8 decorating tip, about a third of the tip extends outside the bag. Push the tip firmly in place and spoon in your filling, leaving enough room at the top to twist the bag shut. It is best to fill the bag with half of the batter at a time, that way it is not too heavy. To make it easier to fill your pastry bag, place it upright in an empty jar or other straight-sided container. This will help steady the bag while you fill it with batter.
Squeezing the bag slowly, pipe each macaron shell out in a single dollop. Lift the bag quickly to finish.

Lemon Curd (Taste.com.au)
Ingredients
2 eggs, plus 2 egg yolks
3/4 cup (165g) caster sugar (Half sugar to 80g)
1/3 cup (80g) chilled unsalted butter
Zest and juice of 2 lemons

Method
1. Whisk whole eggs, yolks and sugar in a saucepan until smooth, then place pan over a low heat.
2. Add the butter, juice and zest and whisk continuously until thickened. Strain through a sieve into a sterilised jar. Lemon curd keeps, covered, in the fridge for 2 weeks.

Impressions

This was the first time I made macarons and they came out with feet! I don’t know what happened with the proportions for the shell because I recall reducing the icing sugar to half but it ended up extremely sweet anyway! Maybe I didn’t reduce the sugar at all haha. I loved the lemon curd, it was perfectly sweet and sour with that lemon aftertaste tang. Lovely.

Lasagne (Taste.com.au)

DSC00306

Lasagne, Italian but as common as a hot dog or meat pie in Australia. I have a strong dislike for those frozen Lasagne packets, or those in the foil, they taste so artificial, lots of cheese and strange mince meat. Ever since I tried making lasagne for myself, I can never go back to the store-bought versions. The Taste.com.au recipe works a treat, isn’t too complex but still requires a few different procedures but well worth it.

“Our Favourite Lasagne Recipe” (Taste.com.au)

Preparation Time
20 minutes

Cooking Time
80 minutes

Ingredients (serves 8)

Mince Mixture
2 tsp olive oil
1 brown onion, halved, finely chopped
2 garlic cloves, crushed
750g beef mince
2 x 400g cans Italian diced tomatoes
125ml (1/2 cup) dry red wine
55g (1/4 cup) tomato paste
Salt & freshly ground black pepper
Bechamel (Cheese) sauce
1L (4 cups) milk
1 brown onion, halved, coarsely chopped
8 fresh parsley stalks
8 whole black peppercorns
4 whole cloves
2 bay leaves
60g butter (Cooking Margarine can be used instead)
50g (1/3 cup) plain flour
70g (1 cup) finely grated parmesan
Pinch ground nutmeg
Salt & ground white pepper
Optional: Dried chilli flakes

Olive oil, extra, to grease
4 fresh lasagne sheets (Or cannelloni sheets but they are smaller and harder to use)
55g (1/2 cup) coarsely grated mozzarella
Mixed salad leaves, to serve

Method

Mince Mixture

1. Heat the oil in a large frying pan over medium heat. Add the onion and garlic and cook, stirring, for 5 minutes or until onion softens. Add the mince and cook, stirring with a wooden spoon to break up any lumps, for 5 minutes or until mince changes colour.

2. Add the tomato, wine and tomato paste, and bring to the boil. Reduce heat to low. Simmer, uncovered, stirring occasionally, for 30 minutes or until sauce thickens slightly. Remove from heat. Taste and season with salt and pepper.

Cheese Sauce

3. Meanwhile, to make the cheese sauce, combine the milk, onion, parsley stalks, peppercorns, cloves and bay leaves in a medium saucepan and bring to a simmer over medium heat. Remove from heat and set aside for 15 minutes to infuse.

4. Strain the milk mixture through a fine sieve into a large jug. Discard solids.

5. Melt the butter in a large saucepan over medium-high heat until foaming. Add the flour and cook, stirring, for 1-2 minutes or until mixture bubbles and begins to come away from the side of the pan. Remove from heat.

6. Gradually pour in half the milk, whisking constantly with a balloon whisk, until mixture is smooth. Gradually add the remaining milk, whisking until smooth and combined.

7. Place saucepan over medium-high heat and bring to the boil, stirring constantly with a wooden spoon, for 5 minutes or until sauce thickens and coats the back of the spoon. Remove from heat. Add the parmesan and stir until cheese melts. Taste and season with nutmeg, salt and white pepper.

Layering

8. Preheat oven to 180°C. Brush a rectangular 3L (12 cup) capacity ovenproof dish with oil to lightly grease. Spread one-quarter of the bechamel sauce over the base of the prepared dish. Arrange 1 lasagne sheet over the sauce. Top with one-third of the mince mixture and one-third of the remaining bechamel (Cheese sauce) sauce. Continue layering with the remaining lasagne sheets, mince mixture and bechamel, finishing with a layer of bechamel. Sprinkle with mozzarella. Place on a baking tray. Bake in preheated oven for 40 minutes or until cheese melts, is golden brown, and the edges are bubbling. Remove from oven and set aside for 10 minutes to set.

9. Cut the lasagne into 8 portions and serve with mixed salad leaves.


Impressions

Making lasagne is like making a tomato based pasta sauce halfway as the mince mixture is not as wet but the flavours of it and procedure is basically the same and yes I do add chilli flakes in there too.

The cheese sauce needs a bit more watching as to avoid the milk mixture from frothing over the saucepan so be careful. The other focus point is when pouring the flour into the butter mixture, it can stick to the bottom of the saucepan/pot that you are using.

I love the bechamel sauce that it makes, it’s so flavourful unlike those take-away sauces. I know it’s an unfair comparison but that’s what most people are used to eating.

We actually used cannelloni sheets because we had some left over but they work just as well as lasagne sheets, but I think they are just a tad smaller so the sauce kinda seeps through when layering. Just layer twice and cover the gaps and it should be fine. I really do enjoy making lasagne and this recipe in particular, and the layering part is fun for kids too!

Homemade Pork and Cabbage Dumplings (Poh’s Kitchen)

IMG_0491

Making your own dumplings is pretty simple. I’m the type of person that likes to make things from scratch to see if it tastes any better than those manufactured/processed ingredients. At least once anyway.

After watching Poh from Poh’s Kitchen/Masterchef Australia Season 1 make dumplings I thought what they hey, let’s do it. We made the dumpling skins, filling and sauce and it wasn’t too much of a challenge!

Pork and Cabbage Dumplings (Poh’s Kitchen)

Ingredients
Dumpling Skins
½ cup plain flour
½ cup wheat starch (wheat cornflour)
Boiled hot water

Dumpling Filling
2 ½ cups Chinese cabbage, finely shredded
½ tsp salt
250g pork mince
3 tsp ginger, chopped finely
1/3 cup spring onions or Chinese chives, chopped
1/8 tsp ground white pepper
¼ cup chicken stock or water
4 ½ tsp light soy sauce
3 tsp Shaoxing wine
1 tbs vegetable oil
4 ½ tsp sesame oil
½ cup shitake dried mushrooms, soaked and chopped

Spicy Dipping Sauce 
¼ cup light soy sauce (1/8 tsp of soy)
6 tsp Chinkiang vinegar (1/4 cup of vinegar)
1/8 cup sugar
2-3 tsp chilli oil
3 tsp ginger, finely shredded
2 tsp garlic, chopped finely
A sprinkling of fresh diced chilli (Optional)

Method
Dumpling Skins
1. Place flour and wheat starch in a bowl.
2. Pour a small amount of hot water into the flour and starch mix and stir with a fork until you can tip it onto the bench top and knead into a firmish, smooth ball. Poh’s recipe doesn’t specify how much water to add, so add maybe a tablespoon at a time because I accidentally added too much and had to re-add the flour and wheat starch to balance everything out.
If it feels a little sticky, add a small amount of equal plain flour and wheat starch and mix to the dough.
3. Wrap in cling wrap and rest for an hour.
Note: If you don’t have wheat starch the traditional way is to use one cup plain flour but follow the same method.

IMG_0487

Dumpling Filling
1. Mix salt with cabbage and allow to sit for 15 minutes so salt can draw liquid out of the cabbage. Wash cabbage briefly before squeezing to remove as much liquid as possible. You should end up with a heaped half cup of cabbage.
2. Mix together with remaining ingredients until everything is incorporated.
3. To make dumplings, sprinkle dough with some plain flour and roll into cylinders with a diameter the size of a 20 cent coin.
3. Cut into one centimetre thick disks and flatten with the palm of your hand. Tuck the disks under an overturned plastic container so they stay moist. With a dumpling rolling pin or 20 centimetre piece of dowel, roll ONLY inwards from the outer edge of each circle, so you maintain a regular circle. If you roll outwards, you will find the circle will become misshapen very quickly.
4. Once the dough has been rolled out to about one millimetre thick, spoon a teaspoonful of the filling onto the centre of the wrapper. When crimping, only pleat one side of the dumpling leaving the other edge straight. This will give the dumpling an attractive crescent shape and let it sit nicely.
5. There are two ways you can cook these. Firstly, you can just boil them in plenty of salt water. When they float, allow them to cook for a further ten seconds, then scoop out with a slotted spoon into a colander.
6. If you want a crispy bottomed finish, position the dumplings neatly in a frypan filled with about one centimetre of water and a dash of peanut oil.
7. Cover and allow the dumplings to steam for about eight to ten minutes. When all the water evaporates, the little bit of oil that remains will help crisp up the bottom. Serve immediately with spice dipping sauce.

IMG_0490

Spicy Dipping Sauce
1. Mix all the ingredients together and serve with dumplings. In brackets I’ve mentioned using minimal soy and more vinegar, I found it was much more reminiscent of the sauces you’d find in any dumpling house. Poh’s recipe uses way too much soy sauce that you can’t even taste the slightly sour/salty Chinkiang vinegar.

We also added diced fresh chilli that really gave it a kick.

IMG_0494

Impressions

The actual process of making the skins was extremely straight forward, and fun to make so that’s a definite plus!

The skin when cooked didn’t have the same bite to it as dumplings at a restaurant. Usually there is this slight chewiness   but nonetheless I found the dumplings to be pretty darn good.

With the changes I made to the sauce, it just made a good dish to a great dish. Loved the Chinkiang vinegar with chilli.

The filling was pretty much what you’d get elsewhere so I’d say that’s a good achievement.  What I liked about these dumplings is that it wasn’t drenched in oil. We used minimal oil or only as much as required so it didn’t stick to the pan and they came out well so I was very happy with the end result.

I might try a different skin recipe but I’d keep the filling and sauce (with changes) recipe for the next time I make it.

Almond and Vanilla Cupcakes

IMG_0539

Using The Crabapple Bakery Cupcake Cookbook by Jennifer Graham again (Buy it here/official website), we decided to do a variation of their Sweetheart cakes minus the icing and shape…. and probably the whole intention of making it actually!

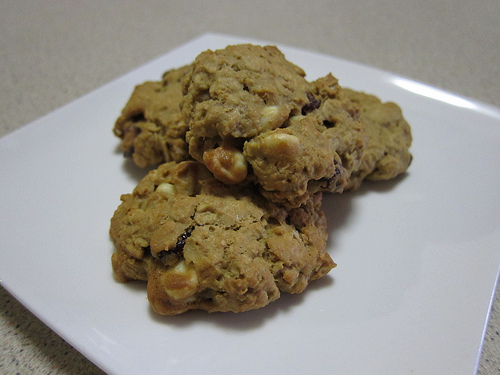
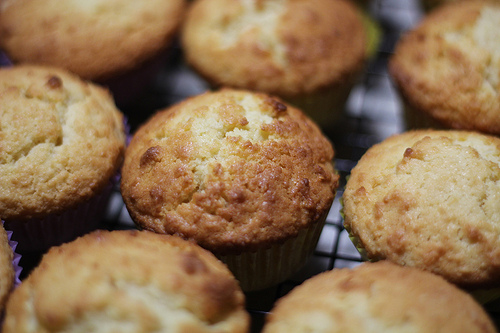
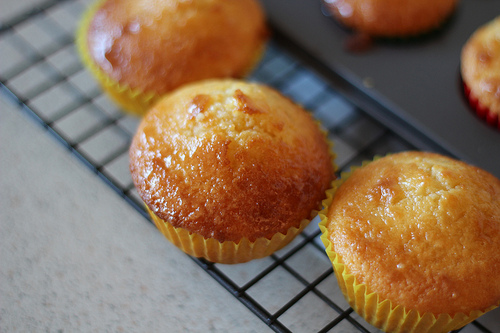
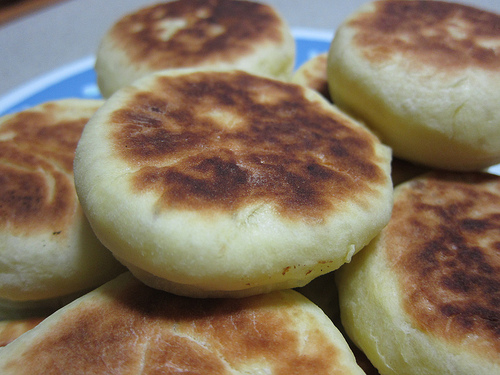
Without any of the decorations and grandeur, these cupcakes are basically Vanilla/Almond flavoured cupcakes.  Don’t they look all rustic and homely?! Check out the recipe below with how to make the decorations/icing as well for those that want to try it.

Almond and Vanilla Cakes

Makes 18 min-heart cakes/24 cupcakes

Ingredients
1 1/2 cups plain flour
1 tablespoon baking powder
3 cups almond meal
250g softened unsalted butter
1 1/2 cups castor sugar (Used 3/4 cups)
6 eggs
1 tablespoon vanilla extract
1/4 cup natural yoghurt

Method
1. Preheat oven to 160C. Lightly grease three six-hole mini heart cake trays (Or just use cupcake pans with paper cups)

2. Sift together flour and baking powder. Add almond meal and combine

3. In a separate bowl, cream the butter for 1-2minutes. Add half the sugar and beat for 2 minutes. Add the rest of the sugar and beat for a further 2 minutes or until light and fluffy. Add the eggs two at a time, beating for 2 minutes after each addition or until mixture is light and fluffy. Add the vanilla and beat until combined.

4. Add a third of the flour to the creamed mixture and beat on low speed until combined. Add half of the yoghurt and beat until combined. Repeat this process. Add the remaining third of the flour and beat until thoroughly combined; do not over-beat as this will toughen the mixture.

5. Spoon mixture into the cake trays, filling each heart just over half full. Bake for 15 minutes or until a fine skewer inserted comes out clean. Leave to cool for about 5 minutes before turning out onto a wire rack to cool for a further 30 minutes before icing.

To make regular cupcakes
5. If using regular cupcake papers instead of mini-heart trays, this recipe makes 24 cupcakes. Bake at 160 C for 20-25 minutes or until a skewer inserted comes out clean.

Decoration
2 quantities Quick Royal Icing
Rose Essence
Food Colouring: Rose Pink
1 quantity Sugared Rose Petals

1. Prepare the icing to pouring consistency. Add 2-3 drops rose essence and 3-4 drops pink food colouring during preparation.

2. Place the sweetheart cakes onto a fine wire rack with feet. Pour over most of the icing, so that each cake is completely covered. Add a few more drops of the pink food colouring to the remaining icing to create a mid-pink colour.

3. Using a teaspoon, drizzle the icing over so that it runs down the sides a little. Use an offset palette knife to life the cakes onto a serving plate, then sprinkle with the sugared rose petals.

Variation
If you’re making these cakes for a man, ice the cakes with Dark Chocolate Ganache  and top with chocolate truffles.

Quick Royal Icing
Ingredients
Water
500 g bag premix royal icing

Makes 3/4 cup icing – enough for 12 cupcakes

1. Simply add a little water at a time to the sifted icing sugar, until you have the required consistency. If you want to use a flavouring essence, add a couple drops to the icing sugar before you add the water. If you want to use colouring, add it before you reach the desired consistency (if you add it at the end it will thin the icing). Use fruit juice or coconut milk instead of water for a flavoured icing.

Sugared Rose Petals
2 Fresh Pink Rose Heads (Not chemically sprayed)
1 egg white, lightly beaten
Castor Sugar

1. Rinse rose heads under cold water. Gently pat dry. Dip each rose petal into the egg white until just covered. Dip the wet petals into a bowl of fine castor sugar and shake off any excess. Place them on a wire rack to dry for about 1 hour.

Dark Chocolate Ganache
1 1/2 cups cream
400 g dark cooking chocolate (chopped)

Makes: 3 cups frosting
1. In a heavy based saucepan, bring the cream to the boil. Place the chocolate into a bowl and pour the boiling cream over. Leave for 1 minute to soften. Use a small spatula to carefully stir the ganache, being careful not to incorporate any air, until you achieve a silky frosting.

2. To use: If you want to achieve a smooth surface, dip cupcakes into the frosting immediately. If you want to achieve a fluffy frosting, let the ganache cool to room temperature and then apply to the cupcake with a small spatula. Do not stir the set ganache too much as it will become dull.

IMG_0540

Impressions

We didn’t go through all that shebang as I’m not a big fan of icing as I find it usually sickly sweet. Crazy I know. So what you get here is cupcakes dressed down to look like muffins. They have this rough texture mostly because of the almond meal that isn’t a fine powder. The process of making this is quite simple, it’s like baking any other cupcake.

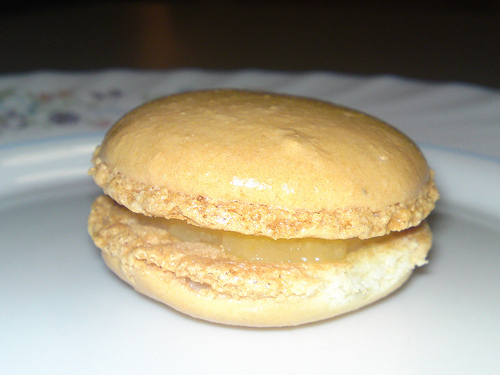
As the cupcake itself it’s quite pleasant, it’s light and has a predominant almond flavour. Which isn’t a bad thing by all means. The texture of the cupcake is more grainy because of the almond meal, the yoghurt helps to make it lighter against the richness of the butter so it doesn’t feel like you’re just having a vanilla butter cake. Overall, I think it makes a nice treat that jumps between muffin and cupcake.

Chocolate Cocoa Cupcakes

IMG_0545

On our little cupcake baking frenzy, we decided to make some chocolate cupcakes. We found a recipe in the The Crabapple Bakery Cupcake Cookbook by Jennifer Graham, you can buy the recipe book here and check out their website and details on the official website. Their actual cupcakes are quite different to what we’ve decided to make, because we didn’t make the icing/toppings or add the little rock chocolates. However the cupcake itself is the same, apart from reducing the sugar but I’ve listed the entire recipe along with what you need to do for the decorations as they do look quite fancy.

Dinosaur Rock Cupcakes – Chocolate Birthday Cakes

Makes: 24

Ingredients
3 cups plain flour
2 teaspoons bicarb soda
1 teaspoon baking powder
1 teaspoon salt
3 tablespoons instant coffee granules
1 cup hot water
1 cup cocoa
1 cup cold water
200g softened unsalted butter
1 1/2 cups castor sugar
4 eggs
1 tablespoon vanilla extract
Icing sugar for dusting

Method
1. Preheat oven to 170C. Line two 12-hole muffin trays with chocolate-coloured cupcake papers

2. Sift together the flour, bicarb of soda, baking powder and salt. In a separate bowl whisk together the coffee, hot water,and cocoa until you have a smooth paste. Add the cold water and whisk until evenly combined.

3. In a separate bowl, creaming the butter for 1-2 minutes. Add the castor sugar a third at a time, beating for 2 minutes after each addition. After the last addition, beat until the mixture is light and fluffy and the sugar has almost dissolved. Add eggs one at a time, beating for 1 minute after each addition or until mixture is light and fluffy. Add the vanilla extract and beat until combined.

4. Add a quarter of the flour to the creamed mixture and beat on low speed until combined. Add a third of the cocoa mixture and beat until combined. Repeat this process twice more. Add the remaining quarter of the flour and beat until thoroughly combined, do not over-beat as this will toughen the mixture.

5. Spoon mixture into cupcake papers, filling each about three quarters full. To prevent the cupcakes cracking on top, allowing the mixture to sit in the cupcake papers for 20 minutes before baking. Bake for 18-20 minutes or until a fine skewer inserted comes out clean.Remove cupcakes from the trays immediately and cool on a wire rack for 30 minutes before frosting.

6. If you prefer no icing, and for simplicity, just dust some icing sugar over cooled cupcakes. Looks like Christmas!

Decoration
1 quantity Vanilla Buttercream
Food Colouring: Apple-Green, Wilton’s Buttercup Yellow
24 Dinosaur/star candles
Chocolate Sprinkles
Chocolate Rocks

1. Divide the buttercream into two small bowls.Add a couple of drops of apple-green food colouring to one bowl and a couple of drops of yellow to the other. Mix to create even colours.

2. Frost half the cupcakes with the yellow buttercream, add half with the green. Working quickly, before the buttercream dries, top each cupcake with a candle, and decorate with sprinkles and chocolate rocks.

IMG_0544

Impressions

The recipe itself is quite nice, the cupcakes are as light as a butter cupcake can be. I found the taste of chocolate to be very mild, as it only uses cocoa powder. I couldn’t really taste the coffee either, I think it’s because our coffee granules have been oxygenated for too long and it has lost most of its coffee aroma. I think I’d prefer a chocolate cupcake to use actual melted chocolate in its recipe because you can really taste the difference when one uses cocoa or chocolate.

Other than that it’s a simple recipe, but if you went all out with decorations, I’m sure it would have tasted even better.

Coconut Lemon Syrup Cupcakes

IMG_0536

Lemons. So useful in so many ways, a good cold remedy but also enjoyable as a refreshing drink or in sweets. I’ve seen Lemon Syrup cakes made previously and when I tasted it I was amazed at how moist it was. It wasn’t very light, it’s actually quite dense as a cake but because of the syrup that oozes through the cake it changes how everything tastes. Yes, lemons can do this.

There were plentiful of recipes out there for Lemon Syrup Cakes but none for cupcakes. Of course cupcakes are just mini cakes but I wasn’t sure of how many cupcakes one batch would make. Alas, I just tried one cake recipe and I made a mix of mini cupcakes and small cupcakes, not those normal sized cupcakes you commonly see.

I found a recipe by Donna Hay, I was hesitant to try it at first because she only knows how to make things look nice to sell magazines and books. However as it turned out, it was a delight. Check out the recipe and my impressions below!

Coconut and Lemon Syrup Cupcakes (Donna Hay)

Makes: Roughly 12-18 average sized cupcakes

(But I can’t be certain as it depends on the size of your cupcake cups)

Ingredients

Cake
150g butter
1/2 cup (100g) caster (superfine) sugar
1 tablespoon finely grated lemon rind
3 eggs
1½ cups (120g) dessicated coconut
1½ cups (225g) self-raising (self-rising) flour
¾ cup (185ml) milk
Lemon Syrup
1 cup (100g) caster (superfine) sugar
¾ cup (185ml) water
2 tablespoons lemon juice (add more to your liking)
Method

1. Preheat oven to 180°C (355ºF).
2. Beat the butter, sugar and lemon rind in an electric mixer until light and creamy. Add the eggs and beat well.
3. Mix through the coconut, flour and milk with a wooden spoon until smooth.
4. Place muffin/cupcake paper into the pans. Pour mixture into pans and bake for 25-35 minutes or until cooked when tested with a skewer. Leave to cool.

IMG_0533
5. To make the lemon syrup, combine the sugar, water and lemon juice in a saucepan over medium heat and stir until dissolved. If you like your syrup to be more “lemony” keep adding tablespoons full of juice until you get your desired flavour. I basically used a whole lemon’s juice but some may prefer just a touch of it.

IMG_0535
6. Simmer for 5 minutes or until thickened slightly and sticky. Pour over warm or cool cake.

7. If pouring is too difficult or slides off (top of cakes may be too crispy), use a brush instead and gently tab over it until it soaks in slightly.

IMG_0538

IMG_0532

Impressions

This recipe is quite easy to make. I had a slight hiccup when the batter looked all kinds of wrong, with the batter separating from the butter. I’m not sure if it was the acidic nature of the lemon rind or not or if I beat the mixture too long but it turned out reasonably well so maybe it was all for the best!

The coconut in the cake gives it such a pleasant texture and bite to it, we used coconut flakes which are chunkier than desiccated coconut but it was still good.

If you reduce the sugar in the lemon syrup as I did you can either reduce the water too or just wait it out and simmer it for longer. I mistakenly poured in the entire 185 mls when I halved the sugar to 100g but it just meant it took a bit longer for it to get thick.

Since my cakes were crispy on top, the syrup just slid right off if you tried pouring it on top. Instead a brush works wonders and can the cake seems to actually absorb more of the syrup. The syrup gives the cupcakes this amazing gloss, I loved it.

I was so pleased with the end result, packed full of lemon flavour. Not too sweet, just right. Would definitely make it again. Good job Donna Hay.


Dragon Cookies

IMG_3813

Once a year, in late January or early February, Chinese New Year comes along celebrating the next animal. Chinese New Year isn’t as extravagant in Australia but in recent years, the festivals in the Chinese dominated suburbs have gotten larger and larger.  I have never experienced an “authentic” CNY in Malaysia, where my parents were born, but they have certainly tried to bring their Malaysian/Chinese culture to Australia. One of the things I love doing is making treats and snacks to celebrate CNY and one of the tastiest treats is the Dragon Cookies. These cookies are so light, it should practically melt in your mouth as soon as you put it in there! It should be crispy and easy to break. It has such a pleasant, slightly buttery flavour but I can’t really describe it. All I know is, it tastes good. Check out the recipe from Home-made Cakes & Pastries – The Best of Patsie Cheong, it’s so easy to make!

Dragon Cookies 

Ingredients

150g Butter

150g Icing Sugar

2 Egg Yolks

1 Egg White


300g Cornflour

30g Milk Powder

60g Plain Flour

1/2 tsp vanilla essence


Method

1. Place the softened butter, icing sugar and eggs (yolks and white) in a bowl.

2. Beat until creamy and light.

3. Slowly stir in the sifted cornflour, milk powder, plain flour and then stir in the vanilla essence.

IMG_3802

4. Put it in a piping bag and press out the pattern. This mixture can get quite soft if it’s humid, so it’s best to do this part quickly.

IMG_3792

5. Put in oven, bake at 150C for 15 mins or until hard all the way through. (Should come out light yellow in colour) Leave to cool.

6. Enjoy!

IMG_3795

Impressions

This is a really simple recipe, but the “Dragon Cookies” can be easily to overcook if you don’t keep watch of them in the oven. As you can see, a few of mine are a tad too golden brown. However, they still taste good, it’s just doesn’t melt in your mouth as well. I have made this every year for the past couple years, and if you have kids it’s great fun for them to pipe and try different shapes, letters, or anything you can think of.

Wholewheat Banana Pancakes

IMG_6891

Sometimes we have plentiful of ripe (or overripe) bananas and we are left with the decision of what to do with them. I have already two banana recipes, Banana Cake and my One Ingredient Banana Ice-Cream. For a morning meal, I found a very nice recipe for Banana Wholewheat Pancakes that goes extremely well with some Canadian Maple Syrup. This recipe is from AllRecipes and I like it because it’s fluffy, but also slightly more healthier (without the maple syrup of course) because it uses wholewheat flour and oats which add another textural component to the pancakes. Check out the recipe below!

Whole Wheat, Oatmeal, and Banana Pancakes (AllRecipes)

Yield: 12 pancake

Ingredients

Dry ingredients
1 cup uncooked rolled oats
1 cup whole wheat flour
3/4 cup all-purpose flour
1/4 cup brown sugar
2 tablespoons dry milk powder
2 teaspoons baking powder
1/2 teaspoon baking soda
1/2 teaspoon salt

Wet ingredients
1 egg
2 cups milk
2 tablespoons vegetable oil
1 teaspoon vanilla extract
1 or 2 bananas, mashed

Directions

1. Place the rolled oats into the jar of a blender and blend until the texture resembles coarse flour.

2. Whisk together the blended oats, whole wheat flour, all-purpose flour, brown sugar, dry milk powder, baking powder, baking soda, and salt in a bowl; set aside.

3. Whisk together the egg, milk, vegetable oil, and vanilla. Stir in the mashed banana. Pour the egg mixture into the flour mixture and stir just until moistened. Let the batter stand for 5 minutes.

4. Heat a lightly oiled griddle over medium-high heat. Drop batter by large spoonfuls onto the griddle, and cook until bubbles form and the edges are dry, about 2 minutes. Flip, and cook until browned on the other side. Repeat with remaining batter.

Impressions

One of the comments on AllRecipes suggests that instead of adding brown sugar, you can add another mashed banana for that added sweetness. This will make the batter slightly dense and less fluffy but as shown in my picture above, it’s still reasonably fluffy. The original recipe only asks for one banana but two medium sized bananas seems to work quite well with no sugar. Of course, the sweetness of the banana doesn’t match the sweetness the brown sugar would, but if you are planning to add some golden syrup or maple syrup later on, then the brown sugar isn’t necessary at all.

You could also make the batter overnight if you don’t have time in the morning. The minor issue with this is that the oil starts to split from the batter. A gentle mix through again is all that’s needed.

This recipe has become my go-to pancake recipe but also made plenty of times when we have too many ripe bananas. The whole wheat flour adds a bit of graininess to the pancakes but a pleasant taste to it as well. If you’re interested in a slightly different type of pancakes that still retains its fluffiness, this is the one to try!

Hotteok/Hoddeok (Pre-mix)

IMG_5504

If you have ever been in a Korean Grocery store, you might have come across a Hotteok pre-mix pack (Beksul is the one I find). Basically Hotteok is a sweet Korean Pancake, I think there are varieties of these pancakes with different fillings. The one that comes in the pack is a brown sugar filling with chopped nuts and cinnamon. I absolutely adore these and have attempted to make it myself. Either way, it’s pretty simple to make, but the Pre-Mix has a much nicer dough, and I’m unsure of what they put into it that gives it that golden colour.

IMG_5466IMG_9520

This is the other Hotteok Pre-Mix I’ve seen. The Beksul one (Not Pictured Pictured!) is in red packaging and tastes much better, and less salty. As the instructions are all in Korean, I had to go search for a translation. Luckily I found My Korean Kitchen.

IMG_5498

Ingredients

1 Pre-Mix Pack (Contains: Flour, Filling and Yeast)

250 ml Water

Oil (Preferably the spray kind)

Plain Flour

Optional: Extra chopped nuts to add to the Filling mixture

IMG_9521

IMG_9522

Method (From My Korean Kitchen)

1. Sieve the premix flour, then add the dry yeast (silver packet) and water, knead it with a wooden spatula

2. Cover the bowl with wrap, and ferment it for 2 hours at room temperature (20-25 ?) The volume of the dough needs to increase by 2 times. I’ve sometimes left it for the whole day just to get the maximum “rise”.

2/ If you like, you can chop some more nuts, we use walnuts but really any nuts will suffice, to the filling.

IMG_5500

3. When the dough is ready, get a couple of spoonfuls of plain flour and place it on a plate. Give the mixture a gentle mix and form 10-20 pieces depending on the size you want. Place each piece into the plain flour so it becomes easier to handle.

4. Widen the dough with your hands and flatten. Place a spoonful of filling into the middle of the flat dough. Seal the dough and shape is like below. Repeat it for the rest of the dough.

IMG_5501

5. Pre heat the frying pan for 20 seconds and add some oil.

IMG_5502

6. Put a couple of the pancakes onto the pan and turn them over when the bottom part is cooked. (Cook them on medium to low heat)

Recommendation from the packet : It is best if you consume all the fermented dough (dough without the filling mix) when you make it. However if you can’t finish it all, keep it in the fridge (if you are going to consume it within 24 hours), otherwise keep it in the freezer, and defrost it well before you use it.

Impressions

What I love above this Pre-Mix is how easy it is to make and so tasty to boot. Eating this warm, will the sugary filling slightly liquid and nutty is just…perfect. It’s delicious on a nice cold winters day, and it’s definitely hard to stop eating it.

The dough is slightly soft, but has a nice crisp texture on the outside, with a sweet and nutty texture in the inside, with a hint of cinnamon. I’ve actually tried this with home-made red bean paste as well, and tastes just as good. So simple to make (Apart from the sticky dough), I can’t see a reason not to give it a try!