Burch and Purchese

IMG_5646-1

Burch and Purchese had been high on my to do list (or to taste list) for quite sometime. Darren Purchese had previously been featured in Masterchef Australia and B&P’s dessert combinations are one of most enticing and creative desserts in Australia.

Finally I found time to travel to South Yarra to take a look-see, and was surprised at how close it was (near the Como Building) and was so closeby to my old high school.

IMG_5620-1
Being someone who just has to try a bit of everything, and especially if there is nuts involved. We had to pick up this Peanut, Raspberry, Caramel and Chocolate dessert.  Layered with peanut chocolate brownie, chocolate wafer, roasted peanut cream, raspberry compote, salted caramel, peanut
butter mousse and raspberry jelly. Raspberry and peanuts isn’t a combination I’ve tried before, and let me tell you it’s amazing. I love the nuttiness, with the tart raspberries and that rich and delectable salted caramel. Yum! This dessert also comes in a cake which will be my next purchese purchase.

IMG_5649-1
B&P’s Explosive Raspberry Milk Chocolate cake is one of their more popular desserts, and who wouldn’t love popping candies in a dessert. It’s like being a kid all over again.

IMG_5694-1

Layered with raspberry cream, raspberry marshmallows, raspberry compote, choc chip cookie crumb base, raspberry & milk chocolate mousse and chocolate popping candy. It has become one of my favourites. That choc chip cookie crumb base is incredibly delicious and again the light chocolate mousse with the tart raspberry flavour works well together and then you get this little popping on your tongue. Memorable for sure.

Impressions

Now I see why B&P is held in such high regard. You can also definitely see the amount of work that goes into making one of these desserts with so many layers and I would assume a plentiful of processes before it’s complete. B&P was well worth the trip down, and my only regret was not trying it sooner!

Burch and Purchese

Burch & Purchese Sweet Studio on Urbanspoon

Raspberry Cake with Raspberry Vanilla Buttercream

IMG_5261

When I made the Raspberry Soufflé, I had excess raspberry purée and I’m the type of person that likes to use up everything I use or I feel it’s a bit of a waste. Especially so, if it’s something that was a bit time consuming to make (sieving of all the seeds out). I found this recipe on Brooklyn Supper that had an amazing looking layered Raspberry Cake with Buttercream frosting. I never had a raspberry cake before so I was quite excited to make this. Check out the recipe below!

Raspberry Cake with Raspberry Vanilla Buttercream Frosting (Brooklyn Supper)

Ingredients
Raspberry Cake
3 cups all-purpose flour
3 1/2 teaspoons baking powder
1/2 teaspoon salt
225g unsalted butter, room temperature
1 cup sugar
5 egg whites, room temperature
2 cups fresh raspberries (I used frozen raspberries)
1/4 cup finely grated beets
1/2 cup whole milk, room temperature
1 teaspoon vanilla extract

DSC00899-1DSC00901-1DSC00902-1
Raspberry Vanilla Buttercream Frosting

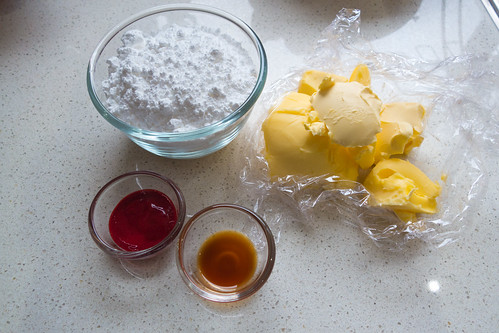
200g unsalted butter, room temperature
1 and 3/4 cups icing sugar, sifted
pinch of sea salt
1 tsp vanilla extract
2 tbsps raspberry purée, as needed

DSC00912-1

Method
Raspberry Cake
1. Preheat the oven to 177  degrees C (350 F). Line the cake pans with parchment circles, and then liberally butter and flour the parchment and pan sides. Set aside.

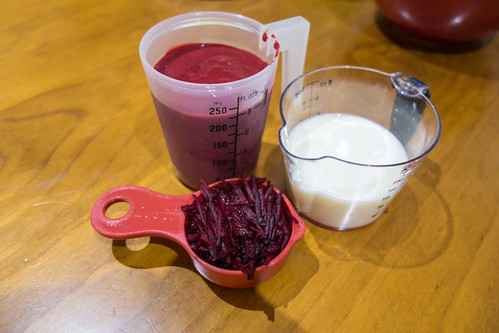
2. In a blender, purée the raspberries. Push the purée through a mesh strainer to remove the seeds.

DSC00903-1
3. In the same blender, combine 1 cup raspberry purée (reserve the rest for the frosting), the grated beets, and the milk. Pour into a glass and set aside.

4. In a large bowl, combine the flour, baking powder, and salt.

5. In the bowl of a stand mixer fitted with the paddle attachment, or in a large bowl with beaters, beat the butter on low until pale and fluffy. Scrape the sides, and add the sugar, beating for a minute or two. Fold in the egg whites.

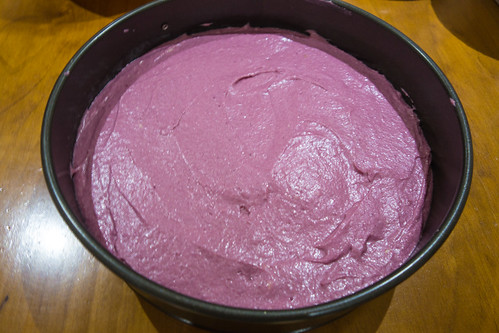
6. Next, with mixer on low, add half the raspberry milk mixture, and half the flour, and then the rest of the milk, and the rest of the flour. Use a spatula to scrape the sides and fold the mixture together, ensuring that the colour is well incorporated.

DSC00905-1
7. Pour the batter into the prepared cake pan (the original recipe uses 2 pans with 2/3 each but I decided on just one), tap on a table to knock some air out if needed.

DSC00909-1
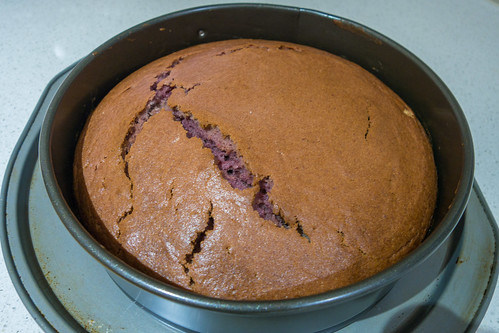
8. Bake cakes for 40 minutes, or until a toothpick inserted in the centre comes out with just a few crumbs attached.

DSC00911-1
9. Set cakes aside to cool. After 15 minutes, flip cakes out of the baking pans and onto a rack to cool completely.

Raspberry Vanilla Buttercream Frosting
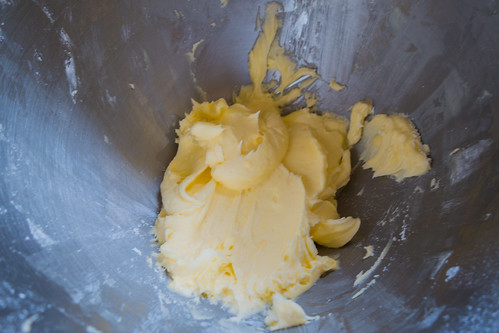
1. In the bowl of a stand mixer fitted with the paddle attachment, or with a regular mixer, beat the butter until light and fluffy on medium speed.

DSC00913-1

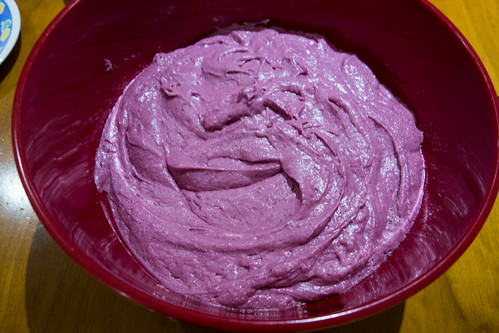
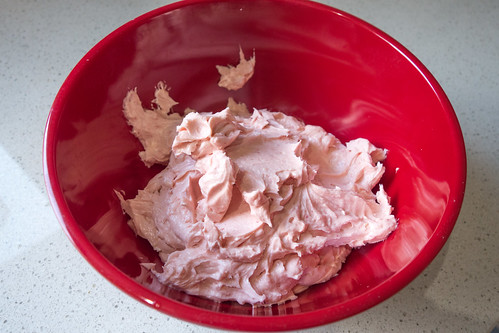
2. Slowly add the confectioners sugar, scraping down the sides often. Add the sea salt and vanilla extract, beat for another minute or two.

3. Add a couple tablespoon or so of purée to the remaining buttercream until you have achieved a thick, but spreadable consistency.

DSC00914-1

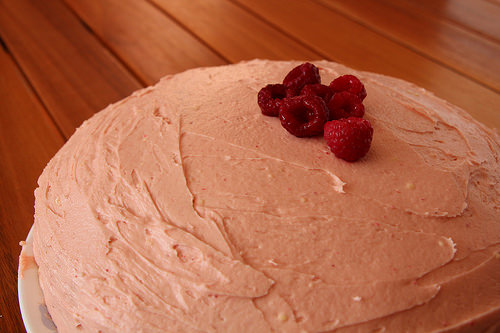
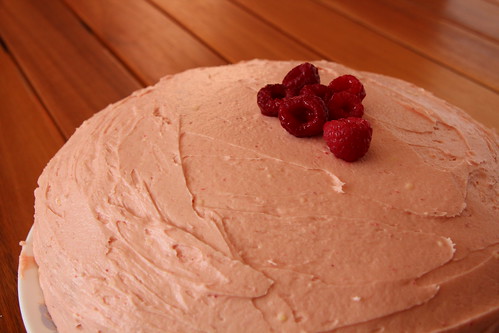
4. Use a long knife/flat spatula to add the buttercream on and spread all around the cake. (I’m not very good at this as you can see). Recommend to add the buttercream before serving or refrigerate after because it can get soft if it sits in room temperature for long.
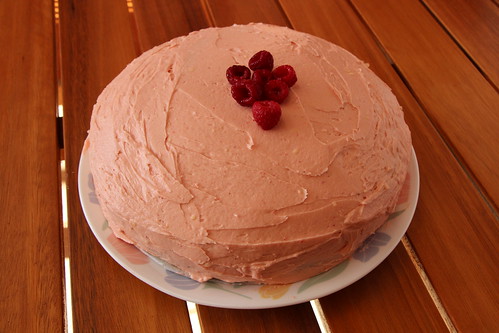
IMG_5266

Impressions

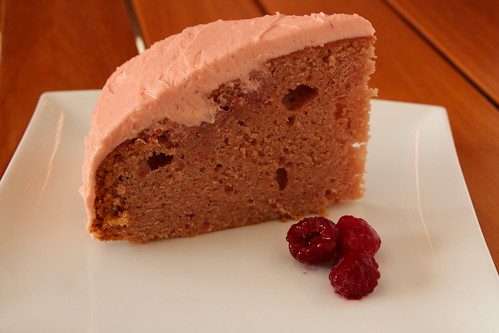
I’m not particular sure if it was just my batter but the cake is a bit on the dense side, but it’s nonetheless delicious. The raspberry flavour comes through exceptionally well and with a bit of sweetness. I lessened the sugar (halved it from the original) in the cake batter because I knew I was going to decorate the cake with the buttercream frosting which is usually super sweet anyway because of the icing sugar.

It’s actually a bit refreshing cake (even though it’s sweet) because of the slight tartness of the raspberries added through the cake mix as well as the buttercream. I made a mistake with the buttercream as my butter wasn’t particularly soft to whip so it ended up with a few small lumps in my buttercream. Preferably I would have used the old microwave trick but I thought leaving the butter overnight would have sufficed (seems not)

Other than that, as you can see there were a few holes in my batter too. I think tapping the mix before placing in the oven would have ensured the holes were gone but live and learn.

This cake requires a bit of work (especially with sieving the raspberries) but I think it’s well worth the effort.

IMG_5280

Ganache Chocolate – Hazelnut Fan Slice

IMG_0552

I’ve already reviewed Gânache Chocolate Macarons, now it’s time to try their cakes. Well… cake (no s) for the time being. One step at a time!

I bought the above pictured cake at their Collins Street, Melbourne CBD store. I heard from a few friends that their Passionfruit cake is pretty darn good but I was instantly drawn to their Hazelnut Fan Slice aka Hazelnut Mousse Cake. Being a fan of both Hazelnut for its tasty nutty flavour, and mousse as it’s so soft, light and delicate it seemed like a fantastic combination with chocolate.

Their mousse cake has a couple of layers as your can see. The bottom layer is this biscuit base that has elements of nuts mixed through it, I found it to be absolutely delicious. They call it a sponge but I usually identify sponge as light and fluffy, but this seemed more like biscuit to me.

The next layer is a hazelnut praline, which is basically soft hazelnut chocolate that’s similar in texture to Nutella. Hazelnut overload yet? I think not!

Apparently there is a layer of Paillete feuilletine, which I have had no experience in tasting nor could I recall eating it but it was there…I think.

The next layer, more like huge chunk, is the chocolate mousse which was beautifully light and melts in your mouth instantly. It’s what I’d call a perfect mousse.

The top layer is a chocolate glaze that is so soft and tasty, it really just blends well altogether. As edible decoration on top, we have a tempered chocolate curl that has that fantastic snap required. To finish the whole dessert off, there is hazelnut pieces to complete the Hazelnut cake.

Impressions

I’ve got to hand it to them, they really know how to create a cake for Hazelnut and Chocolate lovers. It’s almost as if this dessert was made just for me!

The mousse along with that strong hazelnut flavour really creates this pleasant not too overly sweet treat. Of course it’s sweet, but it’s not sickly sweet. Now I’m really tempted to try their Mango/Passionfruit cake for a less rich option.

Ganache Chocolate on Urbanspoon

Gânache Chocolate

245 Collins St
Melbourne VIC 3000

Mocha Chiffon Cake (Gourmeted Goldilocks Recipe)

IMG_0357

I was searching high and low for a nice looking Mocha Cake to bake for my mother. I came across Gourmeted’s Goldilocks Mocha Cake Recipe which looked fantastic. I’ve tried this a few times following the exact method however on both occasions my cake sank like a rock. One my third attempt I thought, why not use the tried and tested Chiffon Cake way. Here is my slightly adapted Gourmeted recipe below. A big thanks to Gourmeted because it’s a fantastic recipe.

Mocha Cake ala  Goldilocks (Gourmeted)
Ingredients

For the Cake:
6 large egg yolks, at room temperature
1 cup sugar
1 teaspoon coffee/espresso granules [Nescafe instant coffee recommended]
1 teaspoon cocoa powder
1 teaspoon vanilla
1 teaspoon water
½ cup canola oil
1 cup cake flour
1 teaspoon baking powder

6 egg whites, at room temperature
1 teaspoon cream of tartar

For the Mocha Buttercream
1 cup sugar
4 large egg whites, at room temperature
3 sticks (12 ounces) unsalted butter, soft, at room temperature
1 teaspoon coffee/espresso granules
1 teaspoon cocoa powder
5 teaspoons water
1 teaspoon vanilla extract
5 teaspoons amaretto (Or Kahlua)
Tools & Equipment

Stand mixer (preferred) but a hand mixer will be sufficient
1 Chiffon cake baking tin

Preparation

1. For the Cake: Preheat oven to 375°F (~160 C)

2. Whisk together egg yolks and sugar in a large bowl (or bowl of a stand mixer) over low, then medium speed, until creamy and light yellow in color.

3. Dissolve espresso or coffee granules and cocoa powder in water and vanilla in a small bowl, getting rid of lumps while stirring. Pour into the egg-sugar mixture, along with canola oil, and beat until well combined.

4. Remove large bowl from stand mixer (if using one) and sift cake flour and baking powder over it. Stir with a wooden spoon until well blended, scraping the sides of the bowl once.

5. Whisk egg whites and cream of tartar into stiff peaks in a medium bowl, and fold into the mocha batter, a dollop or two first to liquefy the thick batter, and then in thirds.

6. Place the batter in the pan. Bake on two racks for 30 to 40 minutes. The cake is done when the tops become golden brown and the cake tester comes out clean when inserted in the middle.

IMG_0350

7. Once ready, take out of the oven and cool upside down on a mug. If you want to make the icing, the cake must be left to cool completely.

IMG_0353

8. For the Buttercream: Whisk sugar and egg whites for 3 to 5 minutes in a medium heatproof bowl set over a saucepan of simmering water (water should not touch the bottom of the bowl), until meringue is hot to the touch. The sugar granules will be dissolved and you will be left with a fluffy marshmallow cream-like froth.

9. Remove bowl from heat and beat for 5 minutes with a hand mixer set to medium speed, or pour into a bowl of a stand mixer with a whisk attachment to mix.

10. Add half of the butter and beat with a hand mixer (or paddle attachment for stand mixer) until smooth before adding the next half to combine. Scrape the sides of the bowl with a spatula and give it a quick stir. Beat again on medium-high for another 6 to 10 minutes to thicken.

11. Dissolve cocoa and espresso/coffee granules in water, vanilla extract, and amaretto in a small bowl. Pour into the buttercream and beat for 2 minutes, scraping the sides at least once.

12. Spoon about ½ cup of frosting on top and spread it evenly with a flat metal spatula.Spread a thick layer of frosting over the side, working from the bottom up to the top. Frost the top by placing a mound of icing and spreading it to the side. You can decorate the cake with the remaining frosting as you wish.


IMG_0362

As you can see I didn’t do the icing this time around. I have done it previously and it is indeed delicious. I used Kahlua instead of Amaretto but I believe Amaretto gives it a nice almond flavour to it.

IMG_0359

Impressions

This  Mocha cake… I’m just going to call it a Mocha Chiffon Cake is beautifully soft. I put it only for roughly 30/35 minutes, just done and it is as moist as ever. If you’re a fan of Chiffon Cakes, and want a slight coffee hit. This is for you! I think if you try the Gourmeted way, you may still find success, it’s just that I used a hand mixer on my previous two attempts. My planetary stand mixer works wonders with egg whites and is excellent in producing stiff peaks so that could be the reason why I found success on my third attempt.

This is slightly smaller than my Orange and Pandan Chiffon Cakes, as it only uses 6 eggs, but it’s still quite nice as you can see. It’s just a tad shorter. I might try a Black Sesame Chiffon Cake sometime because I seriously can’t get enough of Black Sesame.


Brownie and Passionfruit Chocolate Gâteau @ Le Petit Gateau

DSC00335

Le Petit Gateau has definitely made a name for itself in Melbourne with it’s delicious cakes and chocolates. Their Brownie and Passionfruit Chocolate Gateau is an interesting combination of passionfruit, chocolate and their famous delicious mudcake praline all rolled into one.

DSC00338

I have got to say, Le Petit just don’t know how to make a bad dessert. Their passionfruit jelly on the top, along with a nice thin layer inside, as well as a delicious crunchy bottom. All the layers create such a wonderful taste in your mouth.  Even if you tasted each layer separately it would have been perfect but together it’s just even better.

DSC00337

Only bad thing I can say is that their prices keep going up every year. It’s heading towards, ‘I don’t know if it’s worth it but I might still buy it anyway because it’s delicious’ pricing but alas I don’t think I would stop going to Le Petit Gateau. I’m hooked.

Le Petit Gateau

458 Little Collins St
Melbourne
Tel: 03 9944 8893
Opening Hours

Monday to Friday, 7:30am-5pm